CETAS ? Simples.

Like some people, I really love/hate the fact that things in the Azure Portal change.

It’s great to see new functionality being added to make things easier (love), but it means that you have to keep going back and updating previous content (hate), and all the stuff you learned you now have to re-learn (hate). On the plus side though, going back to Azure after a while and finding something new and fun – that’s a LOVELOVELOVE from me !

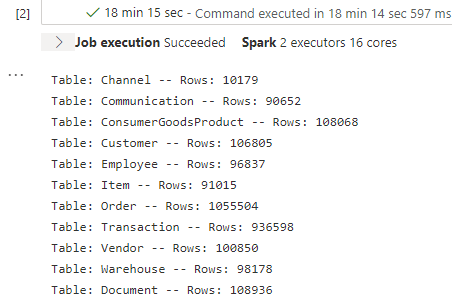
Having taken a break for reasons I won’t go into rn, recently someone asked me about Synapse Analytics using CSVs or Parquet files in Data Lake Storage Gen2, and crafting queries and notebooks in a Synapse Workspace.

Naturally, you start with the OPENROWSET() feature and point your queries directly at the files, but this gets quite cumbersome with complex queries from multiple sources. It would be far easier to just use them like database tables – you know, old skool stylee.

Again, quite naturally from that you start to look into Create External Table As Select (CETAS) and all the syntactic joy and heartache that CETAS can bring. Seriously, why isn’t there an easy way to do this ??

Well….

…there is !😊

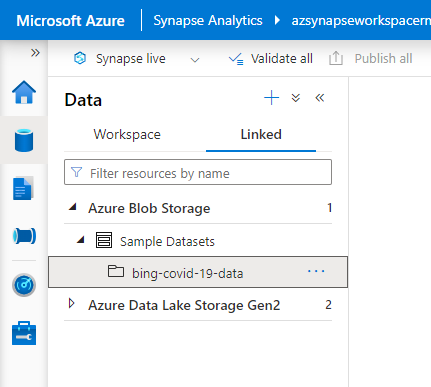
What follows is me getting rabbit-holed by stuff (easy, amirite?), and assumes that you’ve already linked the Bing COVID-19 sample dataset to your workspace:

* If you’ve also linked your ADLSGen2, you can do this from there as well, but let’s stick with something that’s easily reproduceable.

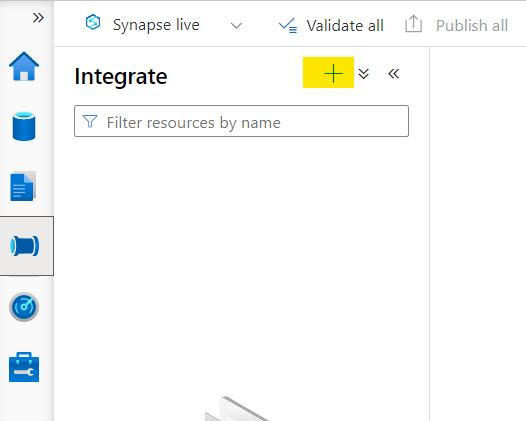
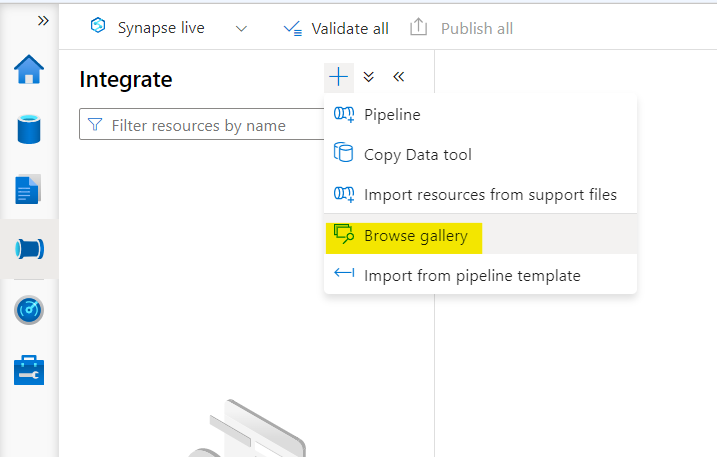
A quick click on the ellipsis shows you ‘New SQL Script’, and following the arrow shows you… Create External Table (tadaaaa):

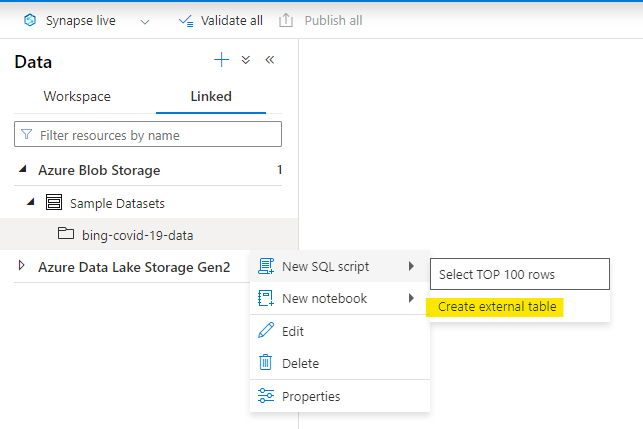
Happy-happy-joy-joy ! A thing to decomplexitate the complex thing !!

Right, let’s go… we’re gonna CETAS LIKE A BOSS !

A blade opens up on the right hand side…

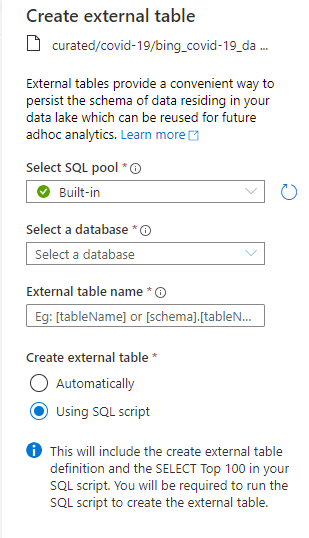
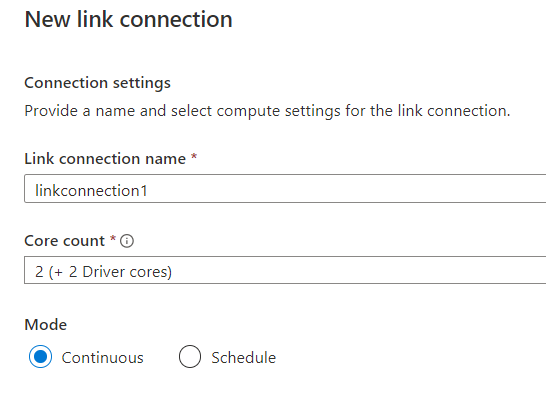
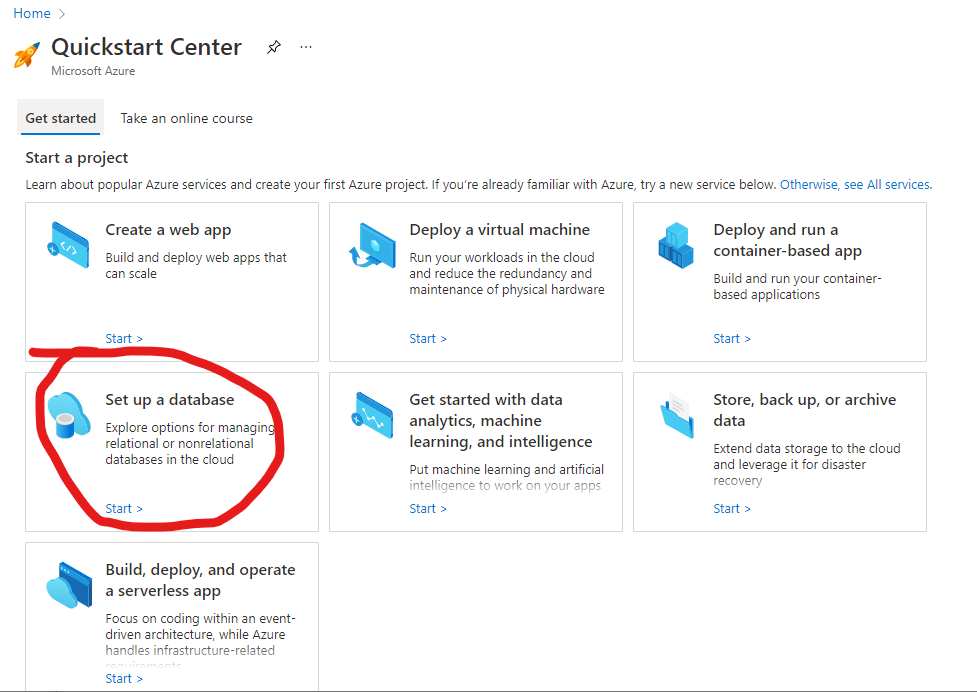
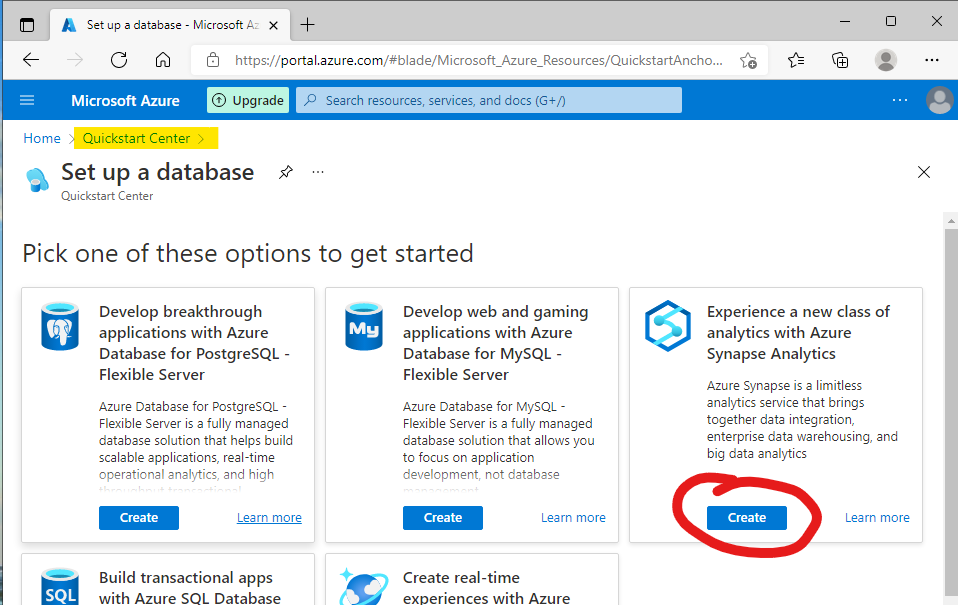
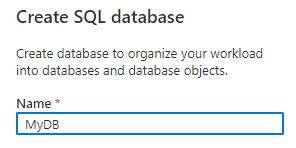
OK, so it wants to use the built-in serverless pool. That’s awesome – something else I don’t have to think about. Oh, but it wants a database to create the table in, and I don’t actually have any SQL Database at the moment, so let’s create a new one from the dropdown…

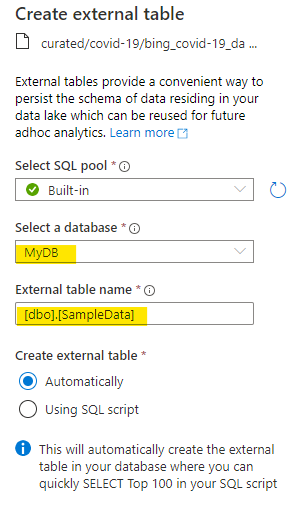
Once that’s done, we can then select it in the dropdown. We need to give the resulting table a schema and a name (I lazily typed [dbo].[SampleData] because I’m not that creative), and there’s a couple of interesting radio buttons after that – one to J*DI and give me a script to just show the first hundred rows from my new external table, and one to show me a script that does all the work, and *then* show the first hundred rows. Being an impetuous type, I J want to *ing D I, so I selected the automatic option.

*if you’re into scripting or want to re-use the code elsewhere, feel free to use the other option. It’s not massively interesting at this point is all I’m saying.

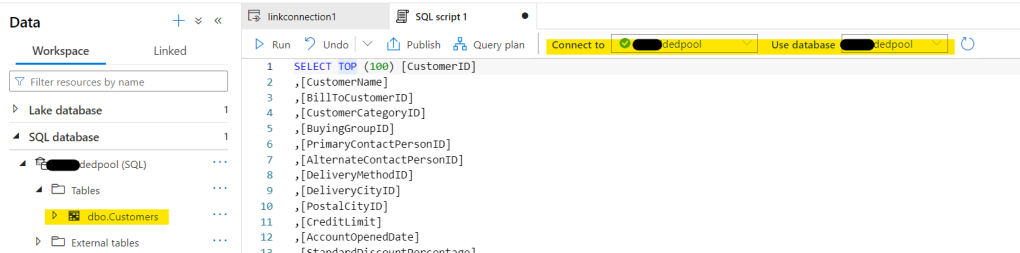
Boom ! We have a script for the first hundred rows, and when we run it, we get… 100 rows !

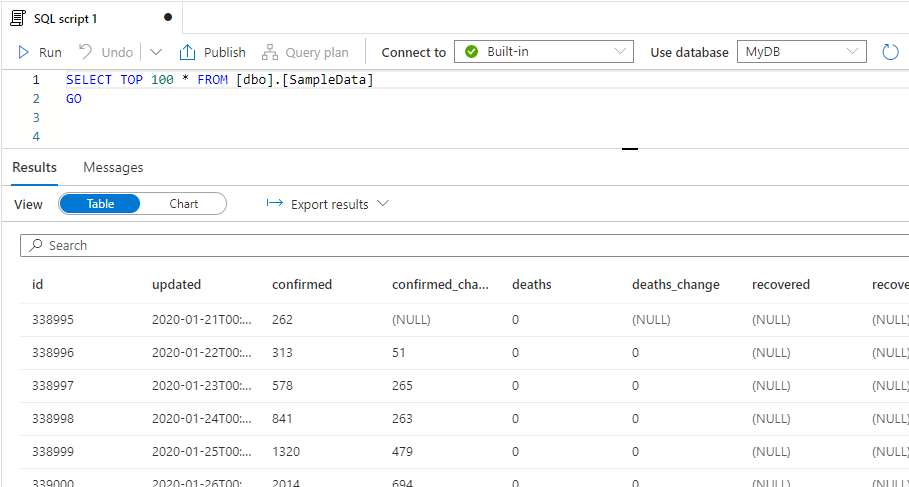
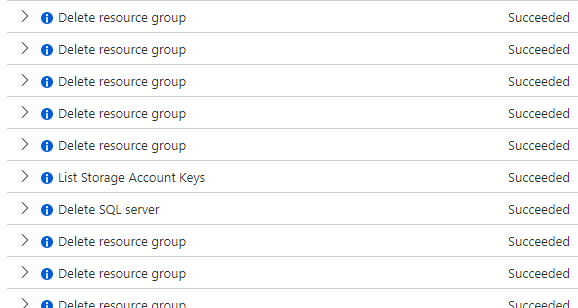
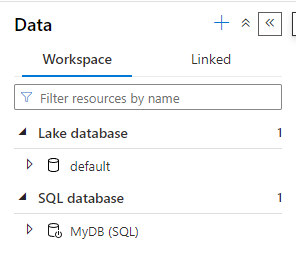
Awesome ! I can see that it’s using my new database ‘MyDB’ as well. Imma just gonna head over to the Workspace page and look at my new database 🤩..

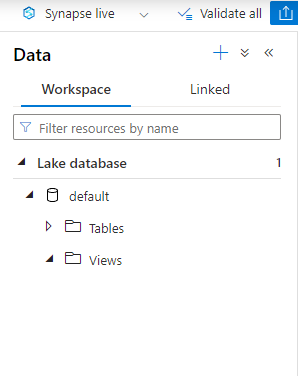
Where’s my new database ? I’ve got a Lake Database, sure, but I should see a SQL Database here by now ? Time for a coffee.

………………

I’m back ! Sorry, had to have a chocolate Hob Nob as well. Hmm, I don’t want to lose my open script, but there’s nowhere to refresh *just* the workspace pane..

Refreshing the whole page will add the node for SQL Databases (but you’ll lose any unsaved/unpublished edits), and now it appears:

You could also just add a new empty SQLDatabase, and that would get the SQL Database node created in the left-hand pane, but that’s kinda my point – Azure is sometime a love/hate call, but whatever it is right now, it’ll probably have changed next time you look at it. It would be nice if the creation of the SQL Database from the Create External Table process added the node to the Workspace pane as well (if you already have some SQL Database, the new one will just appear in the list if you refresh it).

On balance, it’s still AMAZING that to CETAS, you don’t need to know all the ins and outs of CETAS, and you can carry on with your Old Skool database stuff without getting derailed. So it’s still a *love* from me.

Back soon(er)….

Linked in

‘Azure Synapse Link. You keep saying those words. I do not think it means what you think it means….’

OK, so, let me start by saying I *love* the idea of being able to query my Azure SQL Database from Synapse Analytics – who wouldn’t – but there are a couple of things to bear in mind when setting that up. If you don’t mind, I’ll step through the process so you can see what I mean…

Firstly, you set this up at the Azure SQL Database end first. I’m assuming here that you already have a database you want to link to Synapse Analytics, and that you already have an Azure Synapse workspace to query from ? Got that ? Great, let’s go…

Over in the Azure Portal, go find the database you want to link. Here I’ll be linking ‘MyDatabase’, but you’ll be linking ‘YourDatabase’ 🙂

Scroll down the.. what is that called ? A picker ? A menu ?? Whatever, scroll down in until you find ‘Azure Synapse Link’:

Helpfully, you’re taken to a ‘Getting Started’ tab on a new page. Change to the ‘Enable Azure Synapse Link tab, and you’ll see this:

This is why you need a workspace to connect your database to 🙂 Fill in your details for the Subscription, Resource Group, and Workspace, stopping for a moment to read the notice at the top…

I’ll come back to that in a bit.

Setting up a Synapse Link has some pre-reqs that need to be in place on your SQL Database – Public Network Access should be enabled, Azure services need permission to access the database, and a system assigned managed identity needs to be enabled. I’m not going to go into that rn, but that’s what needs to be in place, so that’s what I’ll do.

Hitting the ‘Configure for prerequisites’ tells you what’s going to happen. In my case, all the pre-reqs are already met. If you don’t already meet them, there’ll be a red ‘x’ instead of a green tick, but when you hit ‘Continue’, the changes will be made. Notice also that these settings affect the instance that your SQL Database is on, not just the database – handy if you have a number of databases on the same server that you want to link to Synapse (hint: maybe do some pre-planning around this and make sure everything is in the right place)

The changes are then made and you get a confirmatory tick before hitting ‘Enable Link’:

That doesn’t actually enable the link, in case you were wondering if that’s it. It connects you to your Azure Synapse workspace, starts Synapse Studio and presents you with some *more* choices to make in a ‘New Link Connection’. Side note: it doesn’t insert the name of the database you just enabled because reasons which will become apparent. Any existing databases already linked will appear in the drop-down. MyDatabase isn’t there, so I’m going to have to create a new one. No, not a new database, a new Source Linked Service.

Name it something memorable, and note ‘Auto-resolve Integration Runtime’ – you can change this if you want and create a new (or existing) one if you prefer. I’m kinda basic, so the default is good for me.

Make sure the FQDN is the name of the instance that your database is on and the database yuo want to create the link to is correct (this should be pre-populated), sprinkle over some credentials to use to access the database and hit ‘Create’ when you’re happy.

I have a table called ‘Customers’ in my database. It’s lonely because it’s the only table 😦 It also contains some datatypes that are not supported in Azure Synapse SQL Databases, but the link process is smart enough to tell me that it can ignore them for replication. It also points out that I don’t have a PRIMARY KEY on my table (for shame!), so won’t let me continue…

brb…..

OK, that’s fixed and I now have a PK on the table. All’s good. I’ll select the one solitary table in my database to link to Synapse and hit ‘Continue:

Right. So. Remember earlier on where it said that there would be cost implications in setting up Azure Synapse Link ? This is why:

This needs a little explanation, I think.

We all know that Synapse has two types of SQL Polls – Serverless and Dedicated.

Serverless is largely free (OK, there’s some cost for storage of your data, but that’s about it, I think) whereas Dedicated means you have to stand up some compute explicitly, and *that* can come at a cost depending on the size of pool you need (Not going into that rn either).

Since Synapse Link is a way of using Synapse Studio on your Azure SQL Databases that stays up to date, you *need* something that’s always there to receive records that you put in it. Did you notice the words ‘not be replicated’ in the table selection ? It’s not a linked server as you might have used previously on-prem, it’s a replica (much like secondary replicas in an Availability Group scenario), and as such requires a Dedicated SQL Pool in the Synapse world.

Side note: Take a look at Managed Instance Link for Availabilty Groups – it’s very much like that, if not identical.

To save costs, you can pause a dedicated pool (but then you won’t receive updates into your replica, so…), but you still have to have one for Azure Synapse Link to work.

Anyway, back to the pretty pictures….

If you already have a dedicated SQL pool spun up, use that and hit ‘Continue’. If not, create one and then hit it 🙂

Everything needs a name, and you need to make some decisions about how many cores to use (really depends on velocity of records going into your Azure SQL Database), and whether you want to run this all the time or on a schedule. I’m just going to use ‘Continuous’ mode for now:

You then get some *more* decisions to make around Distribution and Structure Types. Again, I’m just using the defaults. Don’t feel like you have to, though…

Since it’s Azure Synapse now, you need to publish the link connection before you can start it:

Once it’s published, you can start it. This might take a minute or two because your Dedicated SQL Pool is being spun up and connected to your source. Note also that you can pause the link here as well:

Indeed it does. Especially when I forgot that I paused the pool a while back to save costs ! D’oh ! But eventually, when the stars align, it starts:

You can add/remove data/tables/other stuff on your AZure SQL Database and that’ll be replicated to the .. err… replica in Azure Synapse, and you can do what you do in Synapse Studio 🙂

One last thing to point out, though. In Synapse Studio, you connect to the Dedicated Pool to query the data that’s now in Synapse. Don’t expect to see the details of the source database in there !

I guess in summary, Azure Synapse Link for Azure SQL Database isn’t the best name since it actually creates a replica of your source database and costs you money instead of just having a ‘special’ connection type. But I have to admit, it’s great tech whichever way you slice it.

Back soon…

Spring cleaning

I don’t know about you, but sometimes I just create stuff in Azure and then don’t touch it again for ages, and then when I go back I can’t remember why I created stuff in the first place…

In these financially-constrained times (and also because when I looked at my resources in the Azure Portal and went ‘YIKES’), I thought that some housekeeping was long overdue. Turns out deleting stuff is both *extremely* satisfying and *slightly* annoying, but the pay-off is a tidy portal, and that has to be good, right ?

Anyway, so I deleted some stuff that I hadn’t used in ages and was costing me money. I was fairly ruthless about it as well: CosmosDB for Cassandra ? Gone. Same for MongoDB. Gone. Same for some Azure Table storage… I figured that if I need it again, I can just recreate it anyways.

I also thought that my Azure Synapse Workspace was also a little.. well, messy to be frank, so while I was in a cleansing mode, let’s bin that as well and start again fresh. I can just recreate it…

So I did, following my own advice here. (Side note: I’m soooo happy I wrote this down somewhere. The steps are the same even if the UI has changed a little)

After having considered my location and region, I went for a local Azure place – feels nice to be close to your data, right ? Making sure that all pre-reqs were in place, sufficiently unique and rememberable, I got to the part where it said ‘Create’.

Happy days. The portal went off and did the things it does so well in sumitting the required tasks and actioning them..

But… disaster ! Oh noes !! I haz a sad:

The storage accounts were created OK, but there was something wrong with my Synapse Workspace creation !! How can this be ?!? I filled in all the things like a good Data Engineer ? I’m sure I did !

Diving into this a little deeper by choosing the Operation Details link, the problem is clear:

Well, clearer. Let’s take a look in the new Resource Group’s activity log for some more info. Ah yes, here it is:

Switching to the JSON view of the failure, we get a *lot* of information, but also details of the actual error:

OK, so that’s suboptimal. Never mind, I can just delete the deployment and start again.

Also, suboptimal. OK, so I can move the new resources into another datacen… ?

Also, nope. I don’t know if it’s possible via some CLI majick, but on the face of it it looks like it’s a no-no.

Now, I *could* try and create the missing resources manually (probably), but rn I’m a little tired and disheartened, so I’m just going to delete the whole shebang and try again in a different region 😦

This time, success !

So, there’s a couple of things to unpick here.

First, although the error seems to say that my subscription isn’t allowed to create new workspaces any more, in reality is looks like a resource constraint in that region (so an Azure thing). That’s good news.

Secondly, I didn’t actually request any ‘Windows Azure SQL Database servers’ when setting up the workspace, and this one is actually quite interesting as it exposes a part of Serverless SQL Pools that people sometimes forget.

Serverless SQL Pools are *not* serverless, it’s just that you can’t control (or even see) the servers that your queries are running on. For any query to work, there *has* to be some compute allocated, even if you’re just using OPENROWSET() to query an external file. Conceptually, the Workspace SQL Query window is just an abstraction of a normal query environment in that it’s exposed *only* via the web UI – it still has to connect to a database engine *somewhere*.

I guess UK West is just a bit busy at the moment. Any why wouldn’t it be ? Who doesn’t love the South West of the UK ? We have some great beaches for surfing, some excellent restaurants, and breathtaking scenery 🙂

Back soon…

Linked-up thinking

Last weekend, I had the pleasure (and, let’s face it, sometimes pain) of being a co-organiser of a full-day Azure Synapse conference – Data Toboggan.

We run three of these events per year: a Winter Edition (the one just gone), a Cool Runnings Edition in the summer, and an Alpine Coaster Edition towards the end of the year. This last one is a little bit different to the others. Maybe I’ll go into more details another time (or maybe you could just attend !)

There were over 350 sign-ups for the last event, and over 100 actual attendees. It was split into three ‘rooms’ called ‘Azure’, ‘Synapse’, and ‘Analytics’ (see what we did there ??), so there was much meeting-on-hold shenanigans going on and it got a bit hectic (well for the event team it did, apparently everyone else thought it was really slick).

Sidebar: Please please please upvote this Teams Feature Request – it’s to let attendees self-select breakout rooms (a feature that’s already in other collaboration platforms). Thank you.

Anyway, what was I saying ? Oh yes, conference stuff.

What’s great about online events (other than attending in your PJs from wherever you happen to be) is that people post helpful comments and other things in the chat if you let them. Yes, opening up chat in meetings can be a bit scary, but if everyone knows there’s a Code Of Conduct like this one and the organisers ensure compliance, it can bring rewards !

One thing I thought of at this last event was that there were some *awesome* additonal resources and references that people posted in the chat window. If you did that, THANK YOU ! because that’s what a sharing community is about.

Problem is, when you leave the meeting, you lose access to the chat. I guess that’s a Teams ‘feature’ that we’re all going to have to live with. As an organiser, I’m *not* going to create identities in our M365 tenant for people to use because Yikes That’s A Lot Of Work. It seems to work fine with the speakers being Guests in our tenant and everyone else is an attendee…

Anyway, what was I saying ? Oh yes, conference stuff.

So, what follows at the end of this post is *all* of the additional resources, web pages, github repos and the like that were posted into any of the chats during the day. They’re not in any order. Well, actually they are – you get bonus points and a reasonable amount of Kudos for working out what it is. They may even all open in new windows, but who knows ? I loves me a bit of jeopardy, I doos.

Hopefully that might be useful to some people. It would be a shame to lose all that additional insight and further reading just because the event isn’t on any more.

Thanks for reading, and maybe catch you at the next Data Toboggan ? Or SQL Bits, perhaps ? The Data Toboggan team will all be there 🙂

Back soon….

https://learn.microsoft.com/en-us/azure/synapse-analytics/guidance/security-white-paper-network-security

https://www.kneedeepintech.com/

https://learn.microsoft.com/en-us/azure/synapse-analytics/guidance/security-white-paper-network-security

https://learn.microsoft.com/en-us/certifications/azure-data-fundamentals/

https://learn.microsoft.com/en-us/certifications/azure-data-engineer/?WT.mc_id=DP-MVP-5004032

https://learn.microsoft.com/en-us/certifications/azure-enterprise-data-analyst-associate/?WT.mc_id=DP-MVP-5004032

https://techcommunity.microsoft.com/t5/microsoft-learn-blog/coming-soon-the-new-azure-enterprise-data-analyst-associate/ba-p/3254422?WT.mc_id=DP-MVP-5004032

https://www.databricks.com/learn/training/login

https://query.prod.cms.rt.microsoft.com/cms/api/am/binary/RE4MbYT

https://learn.microsoft.com/en-us/azure/synapse-analytics/sql/develop-openrowset

https://techcommunity.microsoft.com/t5/azure-synapse-analytics-blog/understand-synapse-dedicated-sql-pool-formerly-sql-dw-and/ba-p/3594628

This PDF

https://techcommunity.microsoft.com/t5/azure-synapse-analytics-blog/how-to-use-cetas-on-serverless-sql-pool-to-improve-performance/ba-p/3548040

https://techcommunity.microsoft.com/t5/azure-synapse-analytics-blog/synapse-spark-delta-time-travel/ba-p/3646789

https://techcommunity.microsoft.com/t5/azure-synapse-analytics-blog/monitoring-synapse-serverless-sql-pool-query-history/ba-p/3710423

https://techcommunity.microsoft.com/t5/azure-synapse-analytics-blog/monitoring-serverless-sql-ended-requests-by-using-log-analytics/ba-p/3650383

https://learn.microsoft.com/en-us/azure/synapse-analytics/migration-guides/

https://techcommunity.microsoft.com/t5/fasttrack-for-azure/azure-synapse-compatibility-checks/ba-p/3603939

https://learn.microsoft.com/en-us/azure/synapse-analytics/synapse-link/synapse-link-for-sql-known-issues

https://modelstorming.com/templates

https://github.com/brianbonk/public/tree/master/Speaks/2023/2023-01-28%20Data%20Toboggan

https://learn.microsoft.com/en-us/azure/cosmos-db/synapse-link?context=%2Fazure%2Fsynapse-analytics%2Fcontext%2Fcontext

https://github.com/MicrosoftLearning/DP-203-Data-Engineer

https://spark.apache.org/docs/3.0.0-preview/sql-ref-syntax-ddl-repair-table.html

https://stackoverflow.com/questions/62260468/convert-databricks-noteboooks-dbc-into-standard-py-files

https://github.com/microsoft/Azure_Synapse_Toolbox

https://docs.microsoft.com/en-us/azure/synapse-analytics/spark/apache-spark-azure-log-analytics

https://techcommunity.microsoft.com/t5/azure-synapse-analytics-blog/monitoring-synapse-serverless-sql-pool-query-history/ba-p/3710423

http://aka.ms/SynapseCommunityResources

https://github.com/pawelpo/presentations

https://www.youtube.com/c/DataToboggan

https://detective.kusto.io/

https://events.sqlbits.com/2023/training-days

Synapse Analytics and Synthetic Data

‘Fake it ’til you make it’

I love it when people provide you with something that lets you get started and is easy to implement. Azure Synapse Analytics Database Templates are (in my opinion) a bit short of the mark, though. They are only as good as what someone else thinks is good – for example, the Consumer Goods template has tables for Customer, Communication, and Warehouse, but none of the columns look like they’re for a physical address (and don’t get me started on the Transaction table).

That said, they still have value – if you’re just poking around and getting used to the environment they’re a great place to start. I’ve already talked about the Map Data tool to get your data into the templates (that’s an in-person only type thing – not something I think I can write down because it would be a loooooong read), but what if you didn’t have to ? What if there was a way of generating synthetic data and using that instead ?

Sidebar: Synthetic Data is one of the new hot topics. Generally, products get all excited about training Machine Learning models, and using them to generate fake data in a consistent manner. Opinion: This actually leans more into good RegEx patterns than ML, but let’s not go there right now.

Helpfully, there is a resource in GitHub that will generate data in your chosen empty template 🙂 It doesn’t even need to know the schema because it works that out itself – it just needs to know the name of your Lake database !

Oh, and it also needs you to set up some stuff and assumes that you know how to do something that’s not immediately apparent when you has set up the stuff. So close !!

The data is (are?) generated by a Python notebook that’s provided, but require you to set up a Spark Pool to run the notebook, and also make sure that a specific Python library is available at runtime.

OK, let’s take a look at the mechanics…

Here’s a bright, shiny, empty Consumer Goods lake database that was created from the Consumer Goods template (duh):

As mentioned, we’re going to need a Spark Pool to run the Notebook. It doesn’t need to be massive, but if it’s too small (not enough cores or RAM) generating the synthetic data will take yonks, and Spark Pools are billed by the hour…

Head over to the ‘Manage’ icon, then ‘Spark Pools’ and select ‘+ New’:

The configuration recommended is in the GitHub documentation, so we’ll just use that.

Go right ahead and create the Spark Pool.

We’ve read the documentation that says we need “A Spark pool with the python library ‘Faker’ installed (simplest method is to have a requirements.txt with a line of text with the library name “faker” loaded in the cluster configuration). ” We have just created the Spark Pool. The simplest method would actually be to explain how you do that in the marksdown. Here goes…

Create a text document called ‘requirements.txt’ on your device’s filesystem. Open it, and type the word ‘Faker’ on the first line, with no leading or trailing spaces or other whitespace that migh mess you up (it’s not YAML, but good practice is good practice, right ?). Save that file and remember where you saved it. <– I can’t always remember where I saved the document I just created 🙂

We now come across another one of those special moments in Azure where things aren’t where you’d expect them to be. What we want to do now is configure our Spark Pool to always load the Faker library on start-up, so you’d think that would be in the configuration blade…

It’s not. It’s here:

We need to enable session packages in the Spark Pool (they’re disabled by default) and tell it what our requirements are for default packages to apply at startup by uploading the requirements.txt file we created earlier:

When the file is upoaded, hit ‘Apply’ and possiby put the kettle on. It can take a few minutes to apply. My advice is to keep the Notifications blade open and do *nothing* until you see the ‘success’ message 🙂

So now we have a Spark Pool with Faker pre-initialised / loaded / installed / whatever the term is. Next step is to copy the notebook contents from the GitHub resource and paste them into a new notebook in Synapse Studio.

Once you’ve got the notebook created (I called mine ‘Synthetic Data Generator’), attach it to your Spark Pool, and change the database name in the first code cell to the name of your shiny new empty templated Lake database:

When we run the first code cell, it will detect the schema in your database (tables, columns, datatypes, etc) and use those in the next cell to generate the data.

Note: These next bits can take quite some time. It’ll take a few minutes to spin up the Spark Pool, and generating the data takes a while as well.

Yeah, OK. That’s just the first code cell. Feel free to run the second, but be prepared to wait *even* longer… at least we don’t have to wait for the pool to start up…

When that’s completed (my, that’s a lot of jobs!), we have successfully generated quite a few rows in each table. It’s not 100% clear how much data can be faked using this method, but a few hundred thousand rows seems like a reasonable data set.

Going back in the the database, we can see that there’s data there, and that there is *some* referential integrity preserved through relationships in the schema, but since there are no foreign keys in the schema, they’re not enforced in the generated dataset. For example, there are no customers that do not also have a transaction recorded (which you’d expect from a store)…

… but there are transactions that have customer ids that are not in the customer table…

That’s probably more to do with the fact that the schemas in the templates do not enforce referential integrity, and that’s probably due to the fact that the data is stored in block blobs in your DataLake Gen 2 storage, but I guess you already knew that… 🙂

So that’s just a quick look at creating synthetic data in Azure Synapse Analytics Database Templates.

Hope that’s useful ?

Back soon….

Sticky labels

Azure Synapse Analytics Dedicated SQL Pools – that’s a whole load of fun right there. Practically limitless compute and data, yumyumyum…

Apart from all the Data Science things that Azure Synapse enables, those lovely people at Microsoft have added a feature that on the face of it looks pretty innocuous but will, I promise you, prove to be very useful down the line. Especially when it comes to tracing who or what did what and how. That feature is called ‘labels’, and it’s available in Dedicated and Serverless SQL Pools (according to the documentation – I’ve only ever used it in Dedicated)

Underwhelmed ? I thought so. Let’s walk through this together…

We’re all familiar with the standard OPTION keyword that’s available across all supported SQL Server versions (on-prem and cloud) that lets you supply a query hint to the database engine (this example yoinked straight off the internet):

USE AdventureWorks2012;
GO
SELECT ProductID, OrderQty, SUM(LineTotal) AS Total
FROM Sales.SalesOrderDetail
WHERE UnitPrice < $5.00
GROUP BY ProductID, OrderQty
ORDER BY ProductID, OrderQty
OPTION (HASH GROUP, FAST 10);
GO

So far so yawn, but for Azure Synapse and PDW, there’s an additional :

SELECT * FROM sys.tables
OPTION (LABEL = 'My Query Label');

Also a bit yawn. But here’s where it gets interesting. You see, adding a label to a query adds that label to a DMV, so you can:

SELECT * FROM sys.dm_pdw_exec_requests r
WHERE r.[label] = 'My Query Label';

Note, this is sys.dm_pdw_exec_requests. It’s not in the normal sys.dm_exec_requests that we all know and love. Here’s hoping they add it to lower versions of SQL Server soon 🙂

This means that (if there’s a will and a coding standard to adhere to) it is possible to label executions and identify them right in the database engine.

For example, you might want to identify each step of an ELT process that’s done in the database so you can identify performance of each step ? Simples – OPTION (LABEL = 'FunkyELT'); or even OPTION (LABEL = 'FunkyELTStep1'); (followed by a separate lable for each step / statement).

Maybe you want to track who’s doing what ? Again, OPTION (LABEL = 'DaveDidThis');

Or maybe refer back to the Jira tickets that brought the statement into being (or tuned it when it turned out to have a sub-optimal construct). Duh – OPTION (LABEL = 'JiraTicketRef');

Tracing them back is now as easy as:

SELECT * FROM sys.dm_pdw_exec_requests r
WHERE r.[label] = 'YourLabelHere';

OK, OK, so it’s not a silver bullet, killer app, or anything – but as someone who’s always interested in what’s going on under the hood, a small tweak that helps you group stuff or uniquely identify a specific workload is *very* welcome !

Back soon…

Looking for inspiration

So, you’re ready to start your journey into Azure Synapse Analytics, right ? But you don’t know where to start and you don’t have vast amounts of experience in creating data warehouses, right ? And you need help ?

Helpfully those nice people over at Microsoft have created some ‘industry standard’ templates – essentially a best-guess of what your data model should look like in Azure Synapse Analytics ! Yay ! Just browse to the gallery, and pick your template !!

Wait – you said you’re *starting* your journey into analytics ? So maybe you’ve burned some Azure credits by following the wizards that create a Workspace (yes, magic *does* happen here), but where are those darn templates that everyone tells you to use ??

At time of writing (the Azure Portal changes where things are occasionally), it’s not a point-and-click thing.

Note: I won’t go into the actual templates here, I’m just showing you where in tarnation they can be found… Sorry 😦

It’s a 7-stage process. Yes, 7 ! Until you can pick your industry template, there are 6 things you need to do

Step 1: Go to your Azure Synapse workspace in the Azure Portal (see elsewhere for details):

Step 2: Hop over to the browser-based Synapse Studio:

Step 3: Hidden away in the left bar is a spool or cotton-reel. That’s the gateway to the ‘Integrate’ stuff, which isn’t exactly where the templates are, but you’re getting warm:

Step 4: Click the ‘+’ button. Unhelpfully, it doesn’t even say anything useful, like ‘add’ or ‘create’:

Step 5: At this point, there’s a flyout that lets you know there’s a gallery:

You would be forgiven for thinking you’re there now. Hang on, you’re *really* close !

Step 6: Because it’s all about the pipelines, that’s the default go-to when entering the gallery. You’re going to need to select ‘Database Templates’ over on the left, because the list is in alphabetical order and the default is last in the alphabet:

Step 7: GOLD !! You can now browse the templates and get started :

What happens next is… well… complicated, and entirely up to you.

Hey, I only told you where to find the templates, not how to use them. That’s for another time, maybe 🙂

If you *still* can’t find them, then the cogs of Azure have miraculously shifted like Jack Sparrow’s compass. Leave me a comment and I’ll see if I can find them for you and update this page… ?

Back soon…

A Sense Of Commnity

So, here we are, looking forward to another SQLBits event, getting our geek on with our #sqlfamily, our learns on with the best Microsoft Data Platform content there is, and generally loving the whole conference experience (be that in-person or remote).

I remember my first ever SQL Bits conference – in 2011 (VIII – By The Seaside) – and by then it was already to go-to event in the UK for anything SQL Server. Somehow, they even bagged a guest appearance by none other than Steve Wozniak !! How cool was *that* ??!!??

I also remember that for a large portion of the event, I was by myself. Not exactly Billy No-Mates, but generally on the periphery of fun stuff that other people were doing. Add that to the stellar line-up of speakers and guests, and at times it felt a bit… yes, this is a true recollection… intimidating.

Me. A production DBA way down the list, in a famous hotel in a town that everbody is supposed to love because Brighton, in large crowds of sometimes noisy people both inside and outside, in awe of the world-famous people (well, in my world, anyway), being there and doing that. Wow. What’s the version of imposter syndrome when you’re just in the same square-mile as all the talent and start to feel anxious ?

But one thing, one very important thing, happened that weekend. I’m not sure exactly when because I got there late on the first day and then there were all the stressy feels described above the next day, but…..

…someone I didn’t know but who looked friendly came over and asked me a question. Again, I can’t remember what that question was, but I can remember *who* it was (I won’t name them here), but it kinda changed things for me from there. Hard to describe – these days we’d probably call it ‘acceptance’, ‘acknowledgement’, ‘validation’ or any number of warm epithets – but I knew at that point that I would move mountains to be at as many of the subsequent events as possible and be part of that community. It made sense to me that if one person’s actions could lift what was, if I’m honest, a bit of lonesome soul then maybe my actions could do the same for someone else in the future?

Fast forward 11 years, and the #sqlfamily is stronger than ever. There’s a fantastic community of wonderful people out there who are just itching to help, teach, investigate, solve, and have a laugh with you. They’re also there for the hard stuff, too. There have been personal losses for many of us in the last couple of years, and I’m proud and emosh about how the community has responded and supported those in pain and suffering.

Community events like SQL Bits are just the best in terms of content and an incredible experience all round – people talk about the Friday Nights more than the sessions it seems – and anyone inside the community will heartily recommend them to anyone.

So, I cast my mind back to my first one, I realise that if it was overwhelming or mildly intimidating way back, then coming to this year’s event would be…. hoo boy… yikes…!

This year, the team at SQL Bits have realised that, for some people, the event can be quite solitary (not everyone wants to go to pub quizzes and parties) and sometimes perhaps feel a bit out of their comfort zone, so there’ll be some things on-site and remotely that are done additionally and differently to recognise this.

They have also asked some people (yes, one of them is me) to be an independent contact point for *anyone* who wants to ask a question before the event, anyone who might be there by themselves and feel a bit unsure of it all, and to be a face that people can recognise when they get there, that they can always talk to socially (my current favourite topics are reduced-salt Marmite, the cult of Agile, anything but dance music, and classic cars of the 1980s) and help reduce some of the anxiety that might prevent you having the best experience of the event.

To that end, I’m putting myself out there. To help, to encourage, to listen, and to be a face that people can connect with either in person or online, be that at SQL Bits or any other event that I’m attending. Even if I’m not attending and you want to get in touch, that’s also fine by me.

Feel free to comment on this post, send me a message, find me at an in-person event, DM me on Twitter – I’ll be there. I’m here to help you get everything you can from the commnity community. And so is the #sqlfamily.

Back soon….

Peas

“I eat my peas with honey;
I’ve done it all my life.
It makes the peas taste funny,
But it keeps them on the knife.” – Anonymous


I’m the sort of person who hoards random leftover stuff in the toolshed because reasons. One reason is that they’re useful (wrenches). Another is that I use them a lot (screwdrivers). Yet another is that I know other people use them, so I’ve got one in case I need one (chisels).

Perhaps the most maddening reason is that there’s some stuff I have just because someone offered me it and I just couldn’t say no. Like the bench-mounted double grinder (I don’t have a bench) and a mitre box, when I think something might be cool or useful, it goes in the shed perhaps never to be used, but I’d rather have a tool that I might need than not have a tool I do need.

With data, there are just so many tools though ! Knowing which one to use is difficult at the best of times – they all do one thing very well and other things beside – and it sets off my anxiety just thinking about the range of possibilities.

Helpfully, there’s someone in the data community (isn’t there always) who takes it upon themselves to document all the available options to make chooosing a tools easier. In this case, it’s Matt Turck. Every year for the past five years, maybe longer, Matt has produced a handy infographic of the Big Data Landscape, accompanied by a very insightful blog which you should make a point of reading. This is the picture for 2016, and this is the one for 2021. Please take a look at them before reading further…

The thing that’s most striking about these images is how much more there is in the later one. The explosion in data and analytics over the last few years, coupled with the availability of more open-source software has led (in my view) to a bewildering array of options for data – so much so that it’s probably easier to stick with what you know.

Making the right technology choice for your thing is important. Making the right tooling choice for manipulating, moving, transforming, aggregating, tagging, reporting, analysing, and visualising your data is also very important. And just as hard, if not harder.

Imagine designing a system in a NoSQL datastore like Apache Cassandra, only to realise that reporting is *not* as simples as a SELECT * FROM table JOIN otherTable ON commonColumn, and you should really redesign your entire keyspace to get that kind of data materialised up front (please, no comments on the relative merits of Materialised Views in Cassandra – that can only end badly).

My point here is that sometimes a plethora of choices can lead to suboptimal decisions. Tooling for the data professional is not ‘When all you’ve got is a hammer, everything starts to look like nails’ – it’s a delicate balancing act between function and useability. Not everyone is going to know every tool. No one expects them to, except possibly recruiters, and nor should anyone denigrate one tool in favour if another to another potential user.

It’s a personal choice, unless your org has a specific toolset, but I’m guessing that most larger orgs won’t have one that covers all of the current tech stack (or if they do, it’s so out of date it’s not funny any more).

The choice comes down to whether you continue to eat peas with honey, buy a spoon, borrow a fork, or stop eating peas in the first place.

Back soon….

Azure Synapse Workspace – getting started

Azure Synapse Analytics. Three little words that mean so much.

If you’ve not heard of all the wonderful things *you* could do with Azure Synapse Analytics, you should totally check out the official Microsoft documentation. There are, of course, a number of community resources out there as well – blogs, user groups, one-day conferences, etc – ask me about that some other time 🙂

If you *have* heard of Azure Synapse Analytics, but don’t know how to get started, well, you’re in the right place. Here’s some steps (and comment) that might help you set up your first Workspace. I have to say ‘comment’ because it’s not 100% plain sailing unless you know what you’re doing, and there are a couple of things that are worth noting from my own experience in starting from scratch. Some familiarity with the Microsoft Azure Portal is assumed, as is the requirement to have a Visual Studio Subscription, and it’s here that we find the first comment:

Comment 1: Why isn’t it easier to get a free Visual Studio subscription ?

By ‘easier’ I mean that there’s a requirement to provide payment details, even for the free-tier stuff. The simplest (and free-est) subscription is called Dev Essentials – $200 free credit on sign-up to be used within 30-days, most services free for a year, and then some services always free. I’ll let you look that up for yourself, but it seems a bit of barrier to entry if you have to provide payment details up front if you’re only going to use the free stuff. Other cloud data providers (MongoDB Atlas, for example) have a free tier that has no such requirement. Maybe it would be better to have the ‘always free’ services always accessible and then bolt-on the pay-as-you-go services as and when you want them. Or perhaps that’s just me….

Anyway, assuming you have a subscription of some sort and can sign in to the Azure Portal, here’s how I set up My First Workspace ™:

On the portal home page, choose the Quick Start Center, then the one that says the thing about a database and then choose the one that mentions Azure Synapse Analytics:

Screengrab of Quickstart Center page

Comment 2: You might have thought that you should hit up the ‘..data analytics, machine learning, and intelligence..’ one. You’d be wrong. What we’re *actually* setting up here is somewhere to put stuff to play with – the resource group and the workspace. It’s not even really a database, so you kinda have to excuse the mixed-messaging on the portal. I guess there just has to be words…

Screengrab of Set Up A Database page

Once you’ve selected ‘Create‘, you are then taken to a configuration page that looks a bit like all the other configuration pages in the Azure Portal (if you’ve seen them before). From here, you just fill in the boxes. Well, no. Some of the boxes are auto-populated for you (the ones in green in the next image). The yellow ones are the ones you have to fill in. Oh, and..

Comment 3: Having different formatting requirements and naming rules on the same form is maddening in the extreme. Some accept MixedCase, some don’t. Some have to be globally unique (ie across *all* of Azure) and some don’t. Helpfully, the form will complain that you’ve violated an arbitrary rule and give you some tips on how to calm it back down again.

Screengrab of basic settings configuration page

You can see that I got massively creative with names and stuff. Seriously, life’s to short to worry about it too much – as long as you can assign tags later on when you get lost in metadata, you should be fine.

The region is East US in the example because when I tried to create it in another region, it failed. That was probably my fault. East US worked, and I’m not precious about it so that’s where it is. You can’t untick the tick box, but to be fair that’s a lot of words right there that most people don’t really understand, so it’s probably for the best.

The Security section is mandatory, the other stuff (networking, tags) less so. Wait, I feel…

Comment 4: If a form or secion is mandatory, can you not display the review and create until it’s completed ? Thanks !

This is where you define all the security stuff. Well, not all the security but enough to get you started. This mainly consists of defining a username for sysadmin functions and password for it that you’ll be using later on (once everything’s set up), but it’s created here so you can supply a password, forget to write it down and shout at your computer later on when you try and reset it..

Screengrab of Security configuration page

Annoyinngly, if you’ve set up Data Lake Storage Gen 2 account like it asked you to in the previous blade, you can’t check the check box. Let’s assume that all’s good and move on.

A word on TDE (transparent data encryption) is worthwhile at this point. Since the data will by default be protected at rest because it’s Azure and they wouldn’t be allowed to store stuff for you without some form of encryption, there’s no need to supply your own key for what is, in effect, encrypting stuff that’s already encrypted. Unless you really really want to. I mean, you must *really* really want to, because enabling double encryption will send you down a rabbit hole of Azure Key Vault and customer-defined key rotation that quite frankly is a bit much if you’re just having a look to see what this technology can do. But it’s there if you want it, and I suppose it’s better to have security front-of-mind.

So, that’s it. The last (mandatory) thing you need to do is punch ‘Review + create‘ ! Well, not really – once you hit that, it takes you to a review page, and then you can hit ‘Create‘. At this point, it’s not worth making a comment about this – Azure is as Azure does…

Screengrab of final ‘Review and Create’ page

Skillfully ignoring the ‘Serverless SQL est. cost / TB‘ notice (because it’s a free service)… wait.. what ??!?… the ‘Create‘ button can now be pushed. Again, this takes you to another information blade, and if it looks a bit like the next image after about 5 minutes, then you win and it’s high-fives all round…

Screengrab of ‘Deployment Success’

Congrats. You are now the proud owner of an Azure Synapse Workspace !

Comment 5: It would be useful at this point to take you to the workspace so you can start to take a look. Disappointlingly, you are instead taken to the resource group that contains your workspace. You have to remember what you called it in the first configuration form and then select it.

Screengrab of Resource Group page

Once you do that, you get something like this (apologies for the redaction, but you know, security)…

Screengrab of actual workspace page

That’s it !

You’re probably going to want to hit a few of those options right now. I’ll leave you to it.

I only said we’d set one up, not what happens when you play with it 🙂

Back soon….