Linked in

‘Azure Synapse Link. You keep saying those words. I do not think it means what you think it means….’

OK, so, let me start by saying I *love* the idea of being able to query my Azure SQL Database from Synapse Analytics – who wouldn’t – but there are a couple of things to bear in mind when setting that up. If you don’t mind, I’ll step through the process so you can see what I mean…

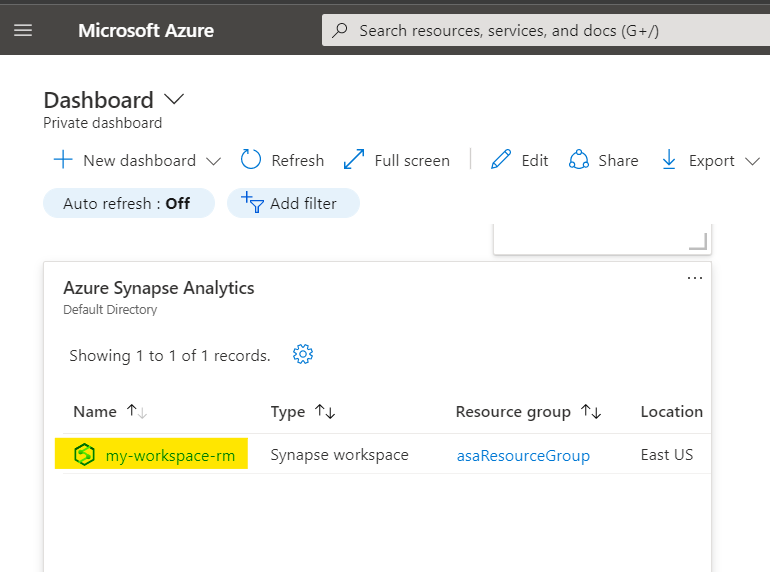
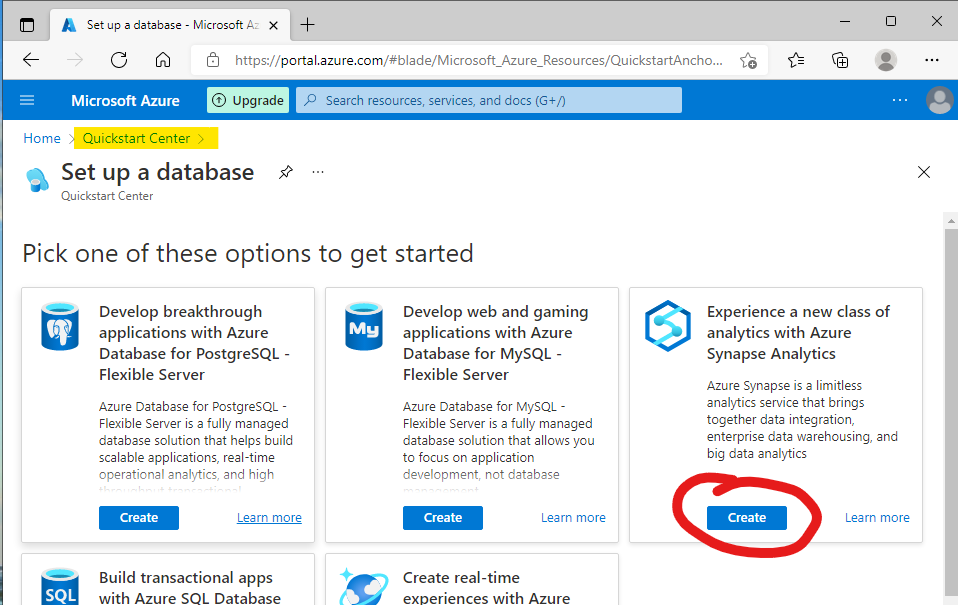
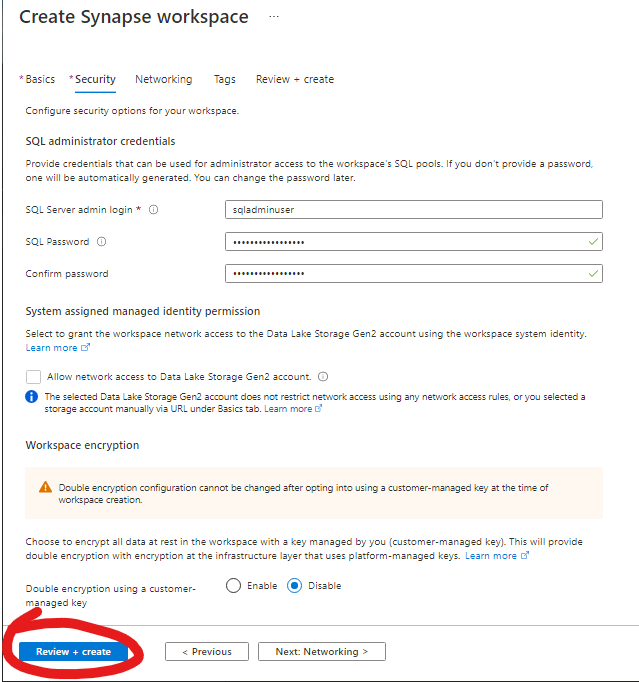
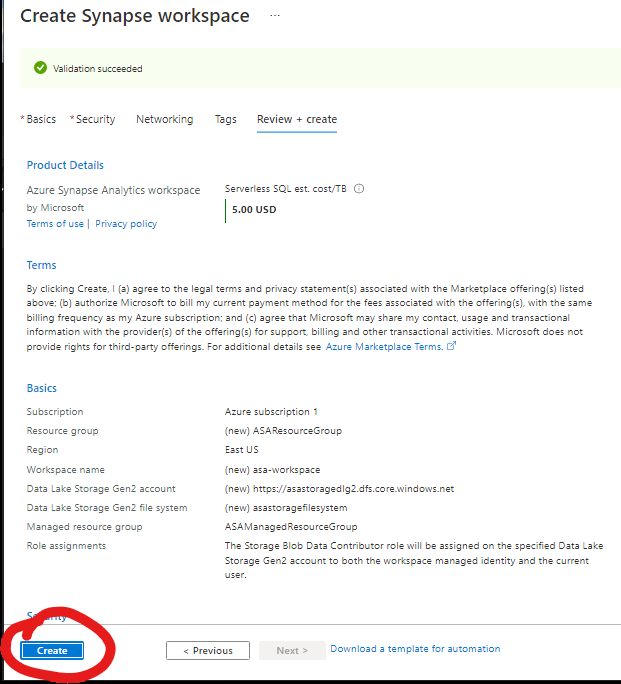
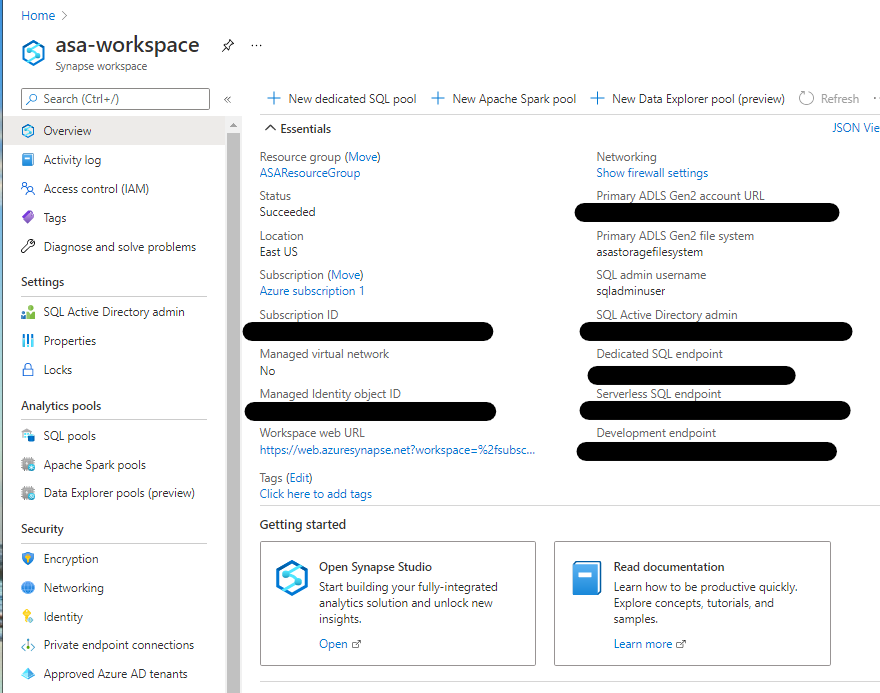
Firstly, you set this up at the Azure SQL Database end first. I’m assuming here that you already have a database you want to link to Synapse Analytics, and that you already have an Azure Synapse workspace to query from ? Got that ? Great, let’s go…

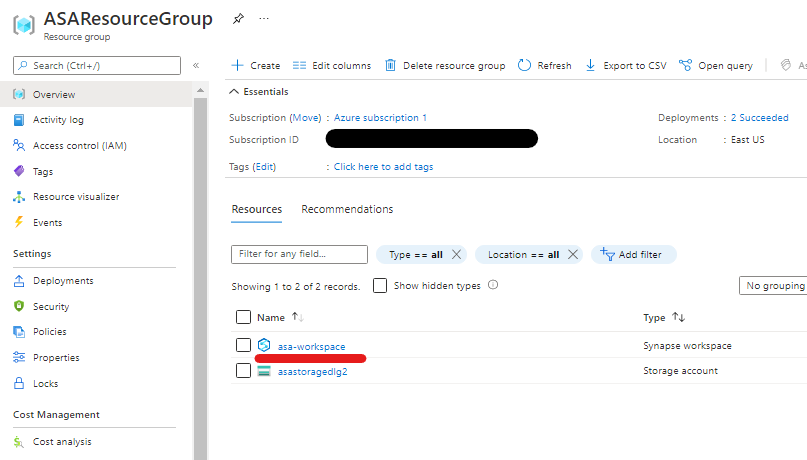
Over in the Azure Portal, go find the database you want to link. Here I’ll be linking ‘MyDatabase’, but you’ll be linking ‘YourDatabase’ 🙂

Scroll down the.. what is that called ? A picker ? A menu ?? Whatever, scroll down in until you find ‘Azure Synapse Link’:

Helpfully, you’re taken to a ‘Getting Started’ tab on a new page. Change to the ‘Enable Azure Synapse Link tab, and you’ll see this:

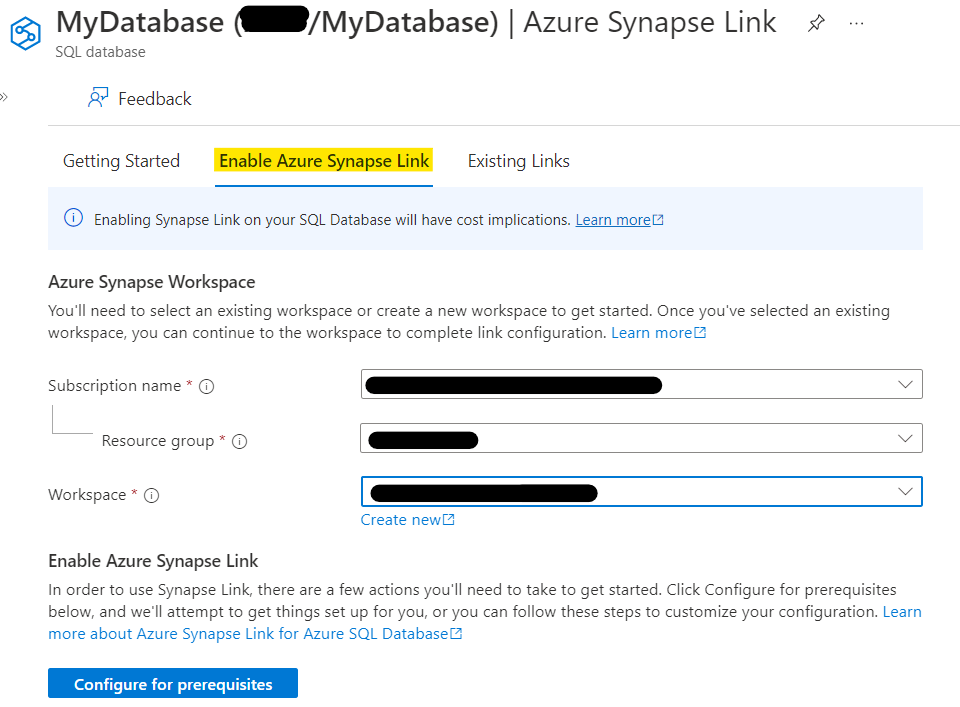
This is why you need a workspace to connect your database to 🙂 Fill in your details for the Subscription, Resource Group, and Workspace, stopping for a moment to read the notice at the top…

I’ll come back to that in a bit.

Setting up a Synapse Link has some pre-reqs that need to be in place on your SQL Database – Public Network Access should be enabled, Azure services need permission to access the database, and a system assigned managed identity needs to be enabled. I’m not going to go into that rn, but that’s what needs to be in place, so that’s what I’ll do.

Hitting the ‘Configure for prerequisites’ tells you what’s going to happen. In my case, all the pre-reqs are already met. If you don’t already meet them, there’ll be a red ‘x’ instead of a green tick, but when you hit ‘Continue’, the changes will be made. Notice also that these settings affect the instance that your SQL Database is on, not just the database – handy if you have a number of databases on the same server that you want to link to Synapse (hint: maybe do some pre-planning around this and make sure everything is in the right place)

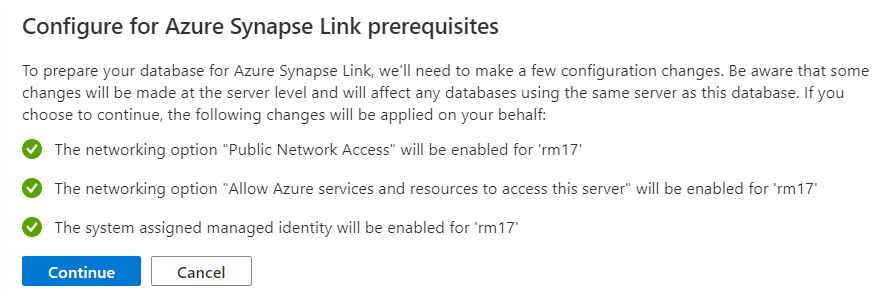
The changes are then made and you get a confirmatory tick before hitting ‘Enable Link’:

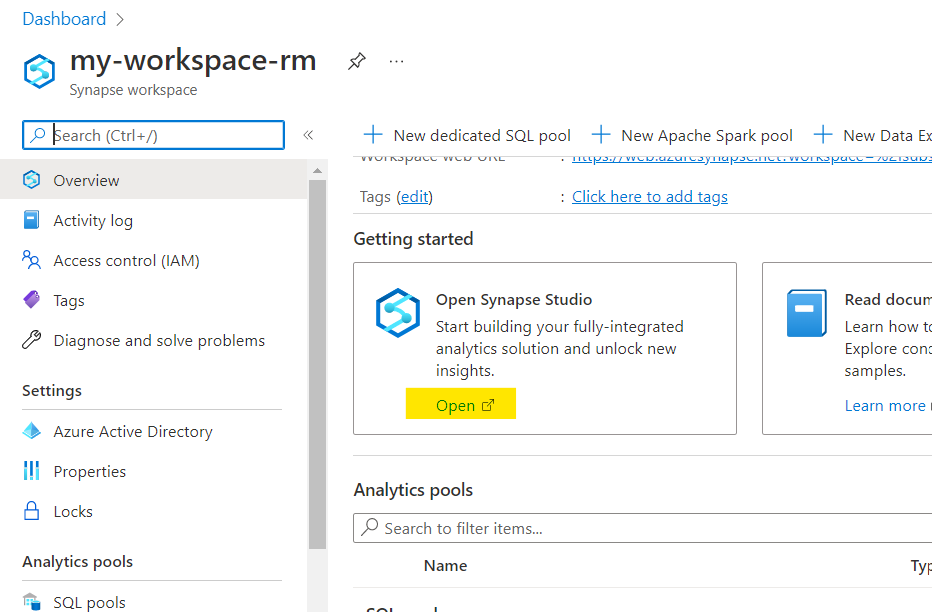
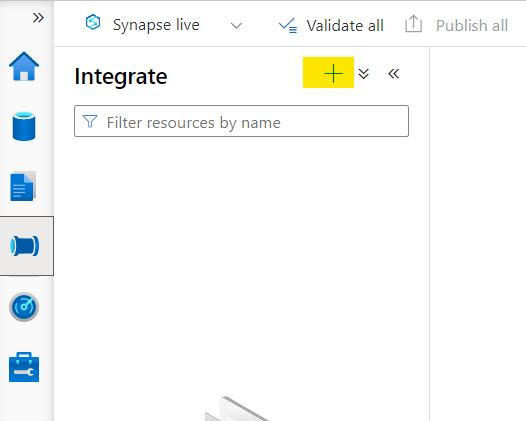
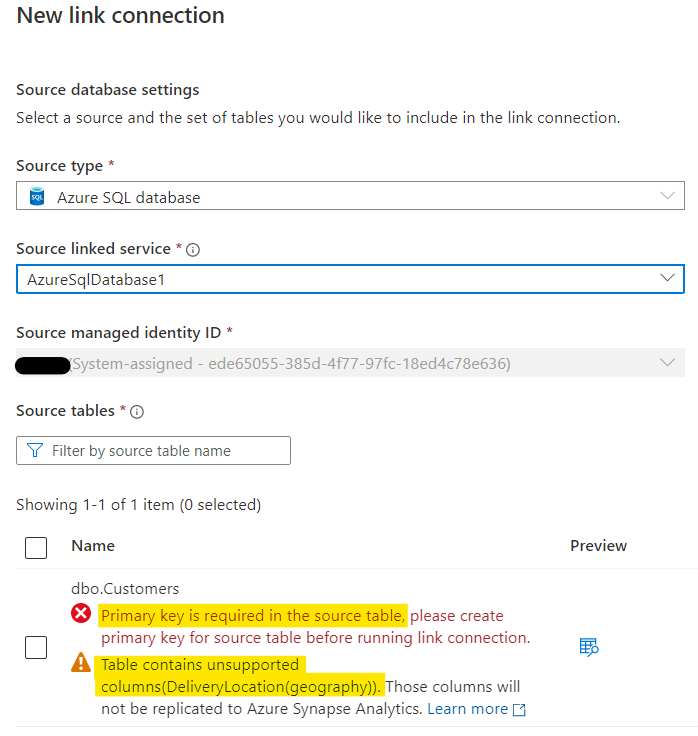
That doesn’t actually enable the link, in case you were wondering if that’s it. It connects you to your Azure Synapse workspace, starts Synapse Studio and presents you with some *more* choices to make in a ‘New Link Connection’. Side note: it doesn’t insert the name of the database you just enabled because reasons which will become apparent. Any existing databases already linked will appear in the drop-down. MyDatabase isn’t there, so I’m going to have to create a new one. No, not a new database, a new Source Linked Service.

Name it something memorable, and note ‘Auto-resolve Integration Runtime’ – you can change this if you want and create a new (or existing) one if you prefer. I’m kinda basic, so the default is good for me.

Make sure the FQDN is the name of the instance that your database is on and the database yuo want to create the link to is correct (this should be pre-populated), sprinkle over some credentials to use to access the database and hit ‘Create’ when you’re happy.

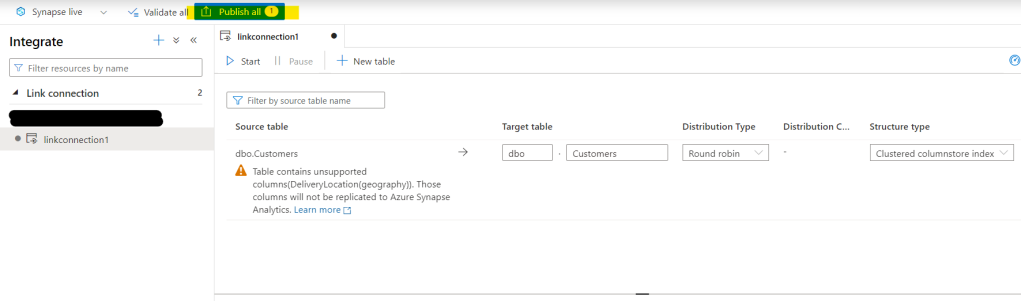
I have a table called ‘Customers’ in my database. It’s lonely because it’s the only table 😦 It also contains some datatypes that are not supported in Azure Synapse SQL Databases, but the link process is smart enough to tell me that it can ignore them for replication. It also points out that I don’t have a PRIMARY KEY on my table (for shame!), so won’t let me continue…

brb…..

OK, that’s fixed and I now have a PK on the table. All’s good. I’ll select the one solitary table in my database to link to Synapse and hit ‘Continue:

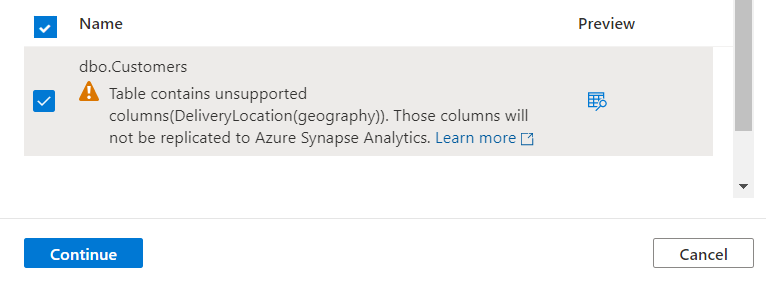
Right. So. Remember earlier on where it said that there would be cost implications in setting up Azure Synapse Link ? This is why:

This needs a little explanation, I think.

We all know that Synapse has two types of SQL Polls – Serverless and Dedicated.

Serverless is largely free (OK, there’s some cost for storage of your data, but that’s about it, I think) whereas Dedicated means you have to stand up some compute explicitly, and *that* can come at a cost depending on the size of pool you need (Not going into that rn either).

Since Synapse Link is a way of using Synapse Studio on your Azure SQL Databases that stays up to date, you *need* something that’s always there to receive records that you put in it. Did you notice the words ‘not be replicated’ in the table selection ? It’s not a linked server as you might have used previously on-prem, it’s a replica (much like secondary replicas in an Availability Group scenario), and as such requires a Dedicated SQL Pool in the Synapse world.

Side note: Take a look at Managed Instance Link for Availabilty Groups – it’s very much like that, if not identical.

To save costs, you can pause a dedicated pool (but then you won’t receive updates into your replica, so…), but you still have to have one for Azure Synapse Link to work.

Anyway, back to the pretty pictures….

If you already have a dedicated SQL pool spun up, use that and hit ‘Continue’. If not, create one and then hit it 🙂

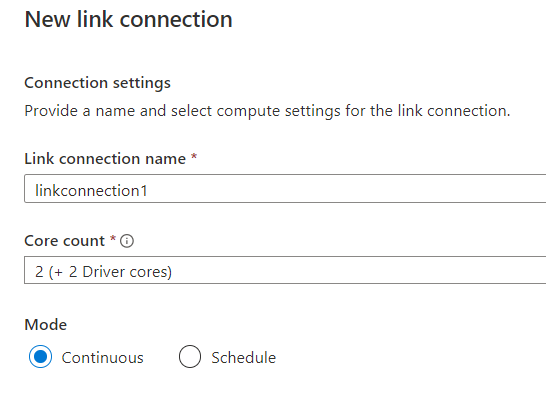
Everything needs a name, and you need to make some decisions about how many cores to use (really depends on velocity of records going into your Azure SQL Database), and whether you want to run this all the time or on a schedule. I’m just going to use ‘Continuous’ mode for now:

You then get some *more* decisions to make around Distribution and Structure Types. Again, I’m just using the defaults. Don’t feel like you have to, though…

Since it’s Azure Synapse now, you need to publish the link connection before you can start it:

Once it’s published, you can start it. This might take a minute or two because your Dedicated SQL Pool is being spun up and connected to your source. Note also that you can pause the link here as well:

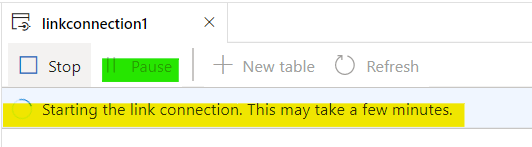
Indeed it does. Especially when I forgot that I paused the pool a while back to save costs ! D’oh ! But eventually, when the stars align, it starts:

You can add/remove data/tables/other stuff on your AZure SQL Database and that’ll be replicated to the .. err… replica in Azure Synapse, and you can do what you do in Synapse Studio 🙂

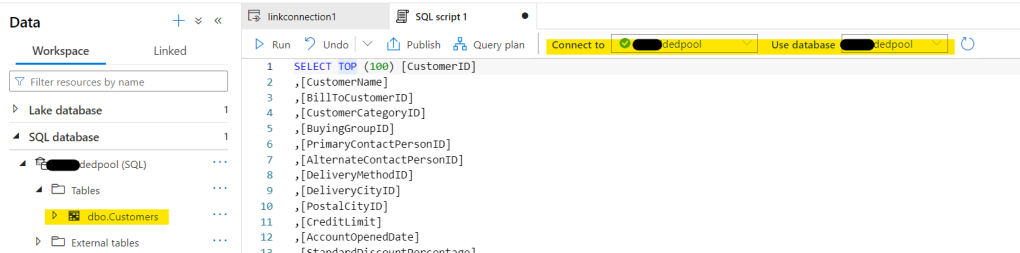
One last thing to point out, though. In Synapse Studio, you connect to the Dedicated Pool to query the data that’s now in Synapse. Don’t expect to see the details of the source database in there !

I guess in summary, Azure Synapse Link for Azure SQL Database isn’t the best name since it actually creates a replica of your source database and costs you money instead of just having a ‘special’ connection type. But I have to admit, it’s great tech whichever way you slice it.

Back soon…

Looking for inspiration

So, you’re ready to start your journey into Azure Synapse Analytics, right ? But you don’t know where to start and you don’t have vast amounts of experience in creating data warehouses, right ? And you need help ?

Helpfully those nice people over at Microsoft have created some ‘industry standard’ templates – essentially a best-guess of what your data model should look like in Azure Synapse Analytics ! Yay ! Just browse to the gallery, and pick your template !!

Wait – you said you’re *starting* your journey into analytics ? So maybe you’ve burned some Azure credits by following the wizards that create a Workspace (yes, magic *does* happen here), but where are those darn templates that everyone tells you to use ??

At time of writing (the Azure Portal changes where things are occasionally), it’s not a point-and-click thing.

Note: I won’t go into the actual templates here, I’m just showing you where in tarnation they can be found… Sorry 😦

It’s a 7-stage process. Yes, 7 ! Until you can pick your industry template, there are 6 things you need to do

Step 1: Go to your Azure Synapse workspace in the Azure Portal (see elsewhere for details):

Step 2: Hop over to the browser-based Synapse Studio:

Step 3: Hidden away in the left bar is a spool or cotton-reel. That’s the gateway to the ‘Integrate’ stuff, which isn’t exactly where the templates are, but you’re getting warm:

Step 4: Click the ‘+’ button. Unhelpfully, it doesn’t even say anything useful, like ‘add’ or ‘create’:

Step 5: At this point, there’s a flyout that lets you know there’s a gallery:

You would be forgiven for thinking you’re there now. Hang on, you’re *really* close !

Step 6: Because it’s all about the pipelines, that’s the default go-to when entering the gallery. You’re going to need to select ‘Database Templates’ over on the left, because the list is in alphabetical order and the default is last in the alphabet:

Step 7: GOLD !! You can now browse the templates and get started :

What happens next is… well… complicated, and entirely up to you.

Hey, I only told you where to find the templates, not how to use them. That’s for another time, maybe 🙂

If you *still* can’t find them, then the cogs of Azure have miraculously shifted like Jack Sparrow’s compass. Leave me a comment and I’ll see if I can find them for you and update this page… ?

Back soon…

Azure Synapse Workspace – getting started

Azure Synapse Analytics. Three little words that mean so much.

If you’ve not heard of all the wonderful things *you* could do with Azure Synapse Analytics, you should totally check out the official Microsoft documentation. There are, of course, a number of community resources out there as well – blogs, user groups, one-day conferences, etc – ask me about that some other time 🙂

If you *have* heard of Azure Synapse Analytics, but don’t know how to get started, well, you’re in the right place. Here’s some steps (and comment) that might help you set up your first Workspace. I have to say ‘comment’ because it’s not 100% plain sailing unless you know what you’re doing, and there are a couple of things that are worth noting from my own experience in starting from scratch. Some familiarity with the Microsoft Azure Portal is assumed, as is the requirement to have a Visual Studio Subscription, and it’s here that we find the first comment:

Comment 1: Why isn’t it easier to get a free Visual Studio subscription ?

By ‘easier’ I mean that there’s a requirement to provide payment details, even for the free-tier stuff. The simplest (and free-est) subscription is called Dev Essentials – $200 free credit on sign-up to be used within 30-days, most services free for a year, and then some services always free. I’ll let you look that up for yourself, but it seems a bit of barrier to entry if you have to provide payment details up front if you’re only going to use the free stuff. Other cloud data providers (MongoDB Atlas, for example) have a free tier that has no such requirement. Maybe it would be better to have the ‘always free’ services always accessible and then bolt-on the pay-as-you-go services as and when you want them. Or perhaps that’s just me….

Anyway, assuming you have a subscription of some sort and can sign in to the Azure Portal, here’s how I set up My First Workspace ™:

On the portal home page, choose the Quick Start Center, then the one that says the thing about a database and then choose the one that mentions Azure Synapse Analytics:

Screengrab of Quickstart Center page

Comment 2: You might have thought that you should hit up the ‘..data analytics, machine learning, and intelligence..’ one. You’d be wrong. What we’re *actually* setting up here is somewhere to put stuff to play with – the resource group and the workspace. It’s not even really a database, so you kinda have to excuse the mixed-messaging on the portal. I guess there just has to be words…

Screengrab of Set Up A Database page

Once you’ve selected ‘Create‘, you are then taken to a configuration page that looks a bit like all the other configuration pages in the Azure Portal (if you’ve seen them before). From here, you just fill in the boxes. Well, no. Some of the boxes are auto-populated for you (the ones in green in the next image). The yellow ones are the ones you have to fill in. Oh, and..

Comment 3: Having different formatting requirements and naming rules on the same form is maddening in the extreme. Some accept MixedCase, some don’t. Some have to be globally unique (ie across *all* of Azure) and some don’t. Helpfully, the form will complain that you’ve violated an arbitrary rule and give you some tips on how to calm it back down again.

Screengrab of basic settings configuration page

You can see that I got massively creative with names and stuff. Seriously, life’s to short to worry about it too much – as long as you can assign tags later on when you get lost in metadata, you should be fine.

The region is East US in the example because when I tried to create it in another region, it failed. That was probably my fault. East US worked, and I’m not precious about it so that’s where it is. You can’t untick the tick box, but to be fair that’s a lot of words right there that most people don’t really understand, so it’s probably for the best.

The Security section is mandatory, the other stuff (networking, tags) less so. Wait, I feel…

Comment 4: If a form or secion is mandatory, can you not display the review and create until it’s completed ? Thanks !

This is where you define all the security stuff. Well, not all the security but enough to get you started. This mainly consists of defining a username for sysadmin functions and password for it that you’ll be using later on (once everything’s set up), but it’s created here so you can supply a password, forget to write it down and shout at your computer later on when you try and reset it..

Screengrab of Security configuration page

Annoyinngly, if you’ve set up Data Lake Storage Gen 2 account like it asked you to in the previous blade, you can’t check the check box. Let’s assume that all’s good and move on.

A word on TDE (transparent data encryption) is worthwhile at this point. Since the data will by default be protected at rest because it’s Azure and they wouldn’t be allowed to store stuff for you without some form of encryption, there’s no need to supply your own key for what is, in effect, encrypting stuff that’s already encrypted. Unless you really really want to. I mean, you must *really* really want to, because enabling double encryption will send you down a rabbit hole of Azure Key Vault and customer-defined key rotation that quite frankly is a bit much if you’re just having a look to see what this technology can do. But it’s there if you want it, and I suppose it’s better to have security front-of-mind.

So, that’s it. The last (mandatory) thing you need to do is punch ‘Review + create‘ ! Well, not really – once you hit that, it takes you to a review page, and then you can hit ‘Create‘. At this point, it’s not worth making a comment about this – Azure is as Azure does…

Screengrab of final ‘Review and Create’ page

Skillfully ignoring the ‘Serverless SQL est. cost / TB‘ notice (because it’s a free service)… wait.. what ??!?… the ‘Create‘ button can now be pushed. Again, this takes you to another information blade, and if it looks a bit like the next image after about 5 minutes, then you win and it’s high-fives all round…

Screengrab of ‘Deployment Success’

Congrats. You are now the proud owner of an Azure Synapse Workspace !

Comment 5: It would be useful at this point to take you to the workspace so you can start to take a look. Disappointlingly, you are instead taken to the resource group that contains your workspace. You have to remember what you called it in the first configuration form and then select it.

Screengrab of Resource Group page

Once you do that, you get something like this (apologies for the redaction, but you know, security)…

Screengrab of actual workspace page

That’s it !

You’re probably going to want to hit a few of those options right now. I’ll leave you to it.

I only said we’d set one up, not what happens when you play with it 🙂

Back soon….

Networking

Gatwick is in Sussex (UK) and is internationally notable for it’s airport. At one time (and probably still now – I just can’t be bothered to check because I have a blog post to write), it was the busiest single-runway international airport in the world.

Around airports, you traditionally get lots of freight businesses, shabby hotels, and the occasional industrial or technology park. In the late 1990s the environs of Gatwick Airport held hosted a curious tenant – the Motorola University – where for one week I found myself learing all sorts of interesting things about TCP/IP, WAN operations, RIP… yeah, it was a blast.

One of the things the class did was to build a worldwide WAN (in a lab, obvs, not in real locations) because Motorola made some rather fun WAN/LAN routers at the time and they presumably wanted to drum up some business by training people how to use the kit their company had just bought without asking them. Hey, it *was* the 90s !

Again with the 90s thing, people (ie TelCos) were moving from boring, old, leased lines that smelled faintly of used engine oil to flaky, variable-latency and yet squeaky-clean and fresh Frame Relay networks, presumably for their own ends. The class was to be taught in 2 sections: the first part of the week was using the trendy Frame Relay stuff, and the latter part using the old, fuddy duddy X25 networking that no-one was using any more bleh eww nasty X25.

This is going to be a longer post that I originally thought. Bear with me, though. I hope the payoff’s worth it…

In the days of BNC ethernet, you just wired up and went. Actually, that was *much* trickier than it sounds, but you get the idea – it’s relatively simple. On the course, the class were assigned a router each (I think I had Singapore) to configure with a name and an IP address that we had designed the topography of – all class C addresses for us ! (the nerds among us will understand), we plugged in the wire and… nothing.

After Turning It Off And On Again, it was noticed that no protocol has been attached to the interface ! Oopsie ! How we chuckled at our own ineptitude as we dutifully assigned Frame Relay to the inbound and outbound interfaces and sat smugly back. Our routers could now chat TCP/IP all day !

Actually, no they couldn’t. See, Frame Relay was/is an a**hole. Yes, you can send packets out of an interface, but to have a catcher at the other end needs an add-on (or Annex, in Frame Relay). So to get the routers catching packets that another router spit out, you need to apply Annex A.

Please note: I forget the acutal Annex notations. You can look these up if you want, but they all exist and are required, so I’m just going to go alphabet on this one for now).

So, your routers are now sending and receiving packets over Frame Relay (henceforth referered to as ‘WTF’), but do you have a functioning network ? Can you ping a known IP address on your network ?

No.

WTF ?

That’s a real WTF, not the acronym above, btw.

In life, four things are guaranteed : Life, Death, Taxes, and Lost Data. Guess which has occurred ? That’s right, networks are flaky AF sometimes, so things go missing. We should really apply Annex B to WTF which adds a Frame Check Sequence checksum to each packet. This means that incoming packets can be inspected to see if they’re in the same stream, and rejected if a packet comes in out of sequence.

Hang on, that’s not what we meant – if one packet takes the long way round the network we don’t want to bin the entire stream, so we need to install Annex C to WTF that caches entries until the next one in the sequence is recieved and then sent to the application in order. Phew.

Quick question: Do you think we have a functioning network yet ?

If you answered ‘Yes’, then I remind you – WTF. Sorry – “Frame Relay”.

The reason the answer is ‘No’ is, what happens when a packet really *does* go MIA ? It happens a lot more than you might be told by your network admins. With WTF Annex Whatever-we-applied-last-to-get-the-damn-thing-working, there’s no way to request a missing packet from the router that originally sent it, so we need to apply the retransmission Annex to WTF to be able to request missing packets from the originating router so we still have a fighting chance of getting this cat gif to where it needs to be.

At this point, things get a little hazy. It was late Friday lunchtime, and people were starting to think about the long drive home. I can’t remember if there’s a further Annex to WTF to enable a buffer on the sender to create a pool from which retransmissions can be requested, and I’m fairly sure there’s an Annex before Annex A to enable acknowledgments, but we’ve come so far and I think I’ve made my point.

And it’s this:

Before you do *anything*, be that on-prem or off-prem, take a *VERY LONG TIME* to understand what you need from your network, what the access paths and controls will be, and make sure you’ve covered everything on paper before you even go near any actual configuration. That includes before buying servers, designing applications, spinning up IaaS, whatever. You can acquire all the compute you want, but if you can’t connect it to anything, it’s just a line on your OpEx.

If you get your network wrong, at best it’s a pain to put right and at worst it’s company-killing security breach. If you have to jump though hoops, know what those hoops are, document them, adhere to them, and *never* play fast-and-loose with a firewall.

If you need an indication of the criticality of getting networking done right up front, try provisioning a VM in Azure. Networking is part of the bunch of questions, sure, but before you can do anything, you need a vNIC, and everything else hangs off that.

Thanks for reading. Back soon…..

Oh, and in case you were wondering, assign the X25 protocol to the ports, and it just works (Not Annex G that provides the abiltity to do X25 over WTF – that’s nuts). Just because it’s old, doesn’t mean it’s rubbish..

On withdrawing my session from SQLBits

This morning, I shared this on Twitter.

This post is some more information…. I’m not sure it is information, it’s more about feelings, anxiety, etc. You know, standard 2020 stuff.

The response from the #SQLFamily has been overwhelming, and affirms my long held belief that SQL Server people are among the very best people in the world.

[apologies for the next bit – it’s taken from messages I’ve already sent privately but I’d like to share the text here and expand a bit]

It’s not been the best of years to be honest, and on a personal note 2019 ended badly with a bereavement followed by another in the early part of this year. I’ve been a bit adrift work-wise for a couple of months, and the ever-changing times we find ourselves in meant that I was lurching from one thing I couldn’t control to another thing I had even less chance of dealing with.

It’s weird, all this stuff. Lockdowns, home schooling, home working, and international issues have forced me out of my bubble and put many terrible things front and center. I thought I was doing OK. Sure, there were good days and bad days, but on balance, things weren’t too bad.

I didn’t realise how much it had all got to me until I started to prep for recording my session and I just couldn’t do it. Like, total freeze. I couldn’t even sit at the keyboard and read what I’d done previously. I felt that ‘No one wants to see this. What *on earth* were you thinking??’. I guess part of the anxiety was seeing all these great people lining up great content, and I just *knew* I couldn’t live up to that. I’m not sure I could have given SQLBits the content they deserve.

Another large part of that was that with other things going on in the world, I couldn’t help but feel, well, helpless. So, although my heart was very much in it, my head just wouldn’t put all this useless noise to one side and then it kept telling me that I couldn’t do it even if I tried every time I even thought about it.

It’s not like I’m broken or anything, but I needed to make one change so I can make others. I’m really sorry it had to be SQLBits, and I feel a bit like I’ve let you all down. Trust me, I’ll get over it and I’ll be back presenting as soon as it’s right.

Admitting this on Twitter is the best thing that happened this year. Well, maybe not the actual best, but it’s in the top two. Top three, definately. After eating the frog this morning and actually formally withdrawing, I’ve admitted to myself that I can’t deal with it right now and it turns out that is OK. It’s also removed that voice that tells me I can’t do other stuff either. This is a Good Thing, because now I can get back to doing what I love.

So, thank you for reading, thank you for having my back, and most importantly thank you for being such a supportive part of my life. I hope to pay that back in the future.


Database files and free space on mount points


OK, so there are several ways to crack this particular nut, some more elegant than others.


You can use WMI (oof), PowerShell (oofoof) or maybe even SQLServer DMVs (tell me more).


I’ve never really got to grips with PowerShell – its on my list, for sure – but there are some occasions where PowerShell might not work for you, for example in restricted environments where you don’t have access to the OS directly. Here’s a way of getting database and mount point space information if you only have ‘public’ access to master…


DMVs are one of my favourite things ever. There’s just so many of them these days and we’re getting more all the time. My *other* favourite thing is CROSS APPLY – also known as the ‘fairy join’ – because I don’t know what it does and yet I can use it to get information that might be hard to join up otherwise !


Let’s put these two to work together to get a list of databases files, where they are, and how much space there is free on the disk where they reside:


–All database mdf mount points and disk free space in MB


SELECT DISTINCT db_Name(f.database_id) AS  [Database], volume_mount_point, (total_bytes / 1024) /1024 AS [Total MB], (available_bytes / 1024) / 1024 AS [Available MB]

FROM sys.master_files AS f 

CROSS APPLY sys.dm_os_volume_stats(f.database_id, f.file_id)

WHERE f.file_id = 1


Database

volume_mount_point

Total MB

Available MB

tempdb

H:\\SQLTemp\\

557733

545029

MyDB1

H:\\SQLData\\

12046999

346111

MyTestDatabase

H:\\SqlData\\

12046999

346111

OtherDB1

H:\\SQLLogs\\

334638

142694


You’ll see here that I’ve taken the easy route and used file_id = 1. That’s the MDF – the primary database file – and you *must* have one of those. Oh, and I can see that someone created a database with its MDF on a mount point intended for transaction logs. I’ll follow that one up later…


A small tweak, and you’ve got the same information for log files (file_id = 2, the LDF);


Database

volume_mount_point

Total MB

Available MB

tempdb

H:\\SQLLogs\\

334638

142694

MyDB1

H:\\SQLLogs\\

334638

142694

MyTestDatabase

H:\\SQLLogs\\

334638

142694

OtherDB1

H:\\SQLLogs\\

334638

142694


That’s better – everything’s lined up nicely and where it should be, except maybe tempdb’s transaction log appears to not to be on dedicated disk. Another item for the backlog…


You might be wondering why I’ve used the DISTINCT keyword in the script. That’s because if you have multiple NDFs (secondary database files) you only really want the one entry back. I haven’t included a script for NDFs (file_id > 2) because I’m not in control of where *you* put them. Besides, giving you everything takes some of the fun out of it, don’t you think ?


Back soon…


How to **** everything up so far it ceases to be funny

So, apropos of a complete breakdown in service, here\’s a few handy tips and action points to make sure your legacy lives on in the most psychologically painful way possible.


They also have the useful side effect of demoralising your team so much that they actively consider leaving a good job and a great employer because they\’re unchallenged, unvalued, and unheard.


  1. When choosing a new technology for your product or service, actively consider how badly you messed it up last time, and seek at all times to replicate those \’winning\’ strategies.
  2. Consider how the new technology can be bent to your will.
  3. How will you hobble performance ?
  4. How will you make your new design less resilient ?
  5. What\’s the lowest level of function that you can provide and could you push that bar even lower ?
  6. When putting together your team, get the brightest minds and force them into scoping meetings that last for weeks but don\’t actually have an output.
  7. Getting money to do things is hard – always try to foster a \’who will pay for this?\’ mindset.
  8. Embrace new ways of working, but only as far as they support and perpetuate your existing business practices – no one likes change.
  9. If change *must* happen, make sure it\’s delayed for as long as possible, but announce delays in small increments (or better still, not at all).
  10. If your customer is important, make sure that everything is process-centric – consistent customer service is better than good customer service.
  11. You\’re a person outside of work – when you enter the workplace, don\’t let on that you\’re a functioning member of society.
  12. Never ask a direct question – words mean far more than actions.
  13. If buying a product off-the-shelf, make sure that customisations you implement mean that it can never be upgraded – you made it better, so that\’s how it\’ll stay. This is especially important if considering SaaS.
  14. Ask your user community what features of technology they\’d like to see, then implement policies or processes that mean those goals can never be reached.
  15. In the event of your solution being accidentally viable, create management and authorisation frameworks so labyrinthine that people give up trying to request enhancements or alterations.
  16. Remember, even a delivery of 10% of the promised functions equates to a 100% successful delivery.
  17. Celebrate success with members of staff who had little or no input and who in all likelihood were not even aware of your project.
  18. If you\’re making progress, claim that one in front of senior management – your team is all behind you.
  19. If you\’re not making progress, micromanage. Two-hourly status calls are a great way to focus the team on solving problems and removing time-sapping blockers.
  20. When preparing presentations, consider your audience. Put as many words on a slide as you can, and ensure each slide contains information on at least three unrelated topics.
  21. When presenting, always stand behind your screen. Make sure to say \’I\’m not just going to read from the slide\’ and then read from the slide.
  22. Block-book 15-seater meeting rooms well in advance, then use them for 1-to-1\’s every other week.
  23. Bookend each workday with all-team meetings with titles like \’DIARY-BUSTER\’ and \”ALL MUST ATTEND\’.
  24. Send those awkward \’bomb-shell\’ emails out of hours. Copy in as many people as you think might make it look important.
  25. Above all, remember there is no \’I\’ in \’Team\’. There is an \’I\’ in failure, but that\’s not an option.


This is by no means an exhaustive list, but hopefully they can help you be a better version of you if you\’re into that kind of thing. Or you could just have read it, recognised some behaviours, smiled nervously, nodded sagely and moved on.


The decision, as they say, is YOURS !


Back soon….


Giving back. Literally….


So, it\’s been a while.


Not that I\’ve not had anything to say, but, you know, work-life balance and all that good stuff….


One of the things I have been doing is attending some of the wonderful community events that we enjoy in the #sqlfamily.


They\’re great for learning, meeting people, and generally doing nerd stuff. I heartily recommend any of them, but particularly the SQL Saturdays that seem to be popping up all over the world.


I don\’t get to travel outside my country that much, and when I do it\’s normally on holiday so geekery is not 100% allowed. However, I *do* like to help out at community events (PASS Summit, SQL Bits, Data Relay, and the like), and there\’s a part of me that *hates* not helping out when I see an event is on. Heck, I\’ve even recently been moderating sessions for PASS Marathon and #24HOP….


Which brings me to the reason for this post.


See, turns out that these events need sponsors. Sponsors have money because they want to showcase their products to you, and they *love* coming to community events, but for most of us the contribution required is far in excess of what we could do in a personal capacity. And some time, events just can\’t find enough corporate sponsors due to various geographic, logistical, or availability reasons, and that puts the event in jeopardy. But there\’s another way we can help, and every little helps, right ?


TL:DR – I just sponsored SQL Saturday Austin as a blog sponsor.


It\’s sure to be epic, and if I can\’t be there in person I can at least still contribute to it.


And that is giving back to the community in quite a nice way, I think.


Back soon…(er)…


Recalcitrant software

 
Visual Studio is 21 years old ! Hooray (said no-one, ever), it can now legally consume alcohol in most places on the planet.
 
 
As you will know by now, I\’m a data guy – plain and simple. I\’ve tried to use Visual Studio since I bought the Student Edition of Visual Studio 6.0, but somehow we\’ve never clicked, if you\’ll pardon the pun.
 
 
It\’s not that I\’m stupid, or that the software is inherently badly designed – 21 years is a long time for any one name to stick around (Question: if VSTS has been renamed to Azure DevOps, is the writing on the wall for the Visual Studio brand ?)
 
 
It\’s just that we don\’t get on. If there\’s someone in your workplace that you can\’t explain why you don\’t like, you can make a good show of being pleasant to them and in front of others while secretly hoping that your paths don\’t cross that often because it\’s always awkward and frustrating.
 
 
With Visual Studio, though, we *have* to spend time together ☹. Specifically because someone thought that data-based processes like ETL, cube design and report authoring would be a good fit for software that most people can\’t even get to MsgBox \”Hello World!\”, and then set about making that nightmare a reality.
 
 
Permit me to step back in time a bit…. Getting a bit misty eyed with nostalgia…
 
 
Back in the day, there was *one* way to get data out of / into SQLServer – the Bulk Copy Utility, or bcp.exe.
 
 
Actually, there were a few ways, but you used them at your peril. bcp was the only one you could trust. In fact, it was so successful, it\’s still around in SQL 2017….
 
 
SQL Server 7.0 brought us Data Transformation Services, an add-in to SQL Server Enterprise Manager that you got by default, and then everyone started talking ETL. (Question: Does anyone remember what people used for Reports back in 1997 ? Was it Crystal Reports ?)
 
 
It was accessed from here:


And looked like this:


Simples, no ? Actually, this kind of basic functionality is still in SQL Server Management Studio – if you\’ve create a maintenance plan, you\’ve used the great-great-great-great-great-grandchild of the original DTS…


See that ? Dts… lovely…. 🙂
 
 
OK, so, moving on, SQL 2000 didn\’t change much, to be honest. Then next step was SQL 2008 Business Intelligence Development Studio, (or BIDS for short)….
 
 
BIDS was an optional install from the source media for SQL 2005 client tools, and brought the design surfaces for Reporting Services, Analysis Services, and the newly labelled Integration Services into one place. Seems fair…


And then it all started to go a bit wrong, didn\’t it, Microsoft ? Yes, I\’m looking at you….
 
The successor to BIDS was SQL Server Data Tools – a new, stand-alone product, outside of the SQL Server installation media, that was completely independent of the database engine. There was much rejoicing when Juneau (the codename for what was to be SSDT) was shown in 2010, and as a stand-alone it was pretty awesome. The installer dropped a Visual Studio Shell to host the software, but that was OK, we were all friends back then.
 
 
By December 2011, though, cracks had started to show. Bill Gibson at Microsoft had to publish an article when people complained that SSDT was missing from Visual Studio after running the installer.
 
 
Then SSDT went to regular releases, meaning you had to go through all this pain again every time a new version came out. At this point, I kinda stopped using it, because other work, but recently I\’ve had to go back to SSDT, and I have to say, I\’m not impressed.
 
 
I chose this time to rip out all my previous versions of Visual Studio, be they full-fat or integrated shell, an install a shiny new version, Visual Studio 2017. I\’d heard it had some extra data bits in it, like Azure, Analytics, Data Science and Python – right up my modern street !
 
 
Imagine my joy when I saw this in the Visual Studio installer options:


Happy-happy-joy-joy, running-man dance, all that stuff !!! YES !! SSDT is now an option to install as part of the Data Storage And Processing workload !
 
Could this be the nirvana I had been seeking ? SSDT fully integrated into Visual Studio Enterprise ? The ability to create database projects *and* integration services projects delivered out-of-the-box with no additional installs required ?


No.
 
 
Despite the installer saying it will install SSDT, you still have to download the installer if you want to use any of the data tools and then tell it to talk to Visual Studio…..


What\’s also slightly irksome is that in that same installer as the options for iOS, Android, and other mobile platforms, Azure, Python, and a whole host of things that Developers care about, but if Microsoft are going to force data professionals into the Visual Studio world (for ETL *and* analytics), then they should at least make the experience less infuriating.


I\’m kind hoping that the tools team behind the excellent VS Code and SQL Operations Studio will be turning their eye to SSDT soon – the time is right for a cross-platform SSDT as a majestic stand-alone again, and I\’ll be pushing all the people I know to make this happen.
 
 
Actually, that\’s just 2 people.
 
 
And I don\’t really know them.
 
 
Or have any influence over what they do….


But that doesn\’t mean we can now get on….


Back soon….


Installing PowerShell on MacOS

 
Wait… what ??!??
 
You can have PowerShell on MacOS ???!???
 
Yep, and on Linux, too 🙂
 
Head over to github, and go get… github.com/powershell/powershell/releases
 
For MacOS, download the file that ends in .pkg, and then install as you would from any .pkg file. You’ll be pwsh-tastic in no time.
 
Couple gotchas, though:
 

  1. You need to be root to install modules. Ho hum.
 

  1. You need to trust the PSGallery repo to install modules
 

  1. You might want to update PowerShellGet while you’re there…
 
 
Starting Powershell can be then done either from the Launcher icon, or by opening a terminal window and executing ‘pwsh’
 
 
Trusting the PSGallery is simples, though.
 
In your pwsh window (as root), run:
 
Set-PSRepository -Name PSGallery -InstallationPolicy Trusted
 
..wait a few seconds, then you should be able to
 
Install-Module PowerShellGet -Force
 
And also..
 
Install-Module SQLServer
 
I’m assuming something similar for Ubuntu 16.04: Get the .deb, install, trust, install-module (s), but I’ve not got that far. Too excited 🙂
 
Happy PWSHing !
 
Back soon..
Â