Azure Synapse Analytics. Three little words that mean so much.
If you’ve not heard of all the wonderful things *you* could do with Azure Synapse Analytics, you should totally check out the official Microsoft documentation. There are, of course, a number of community resources out there as well – blogs, user groups, one-day conferences, etc – ask me about that some other time 🙂
If you *have* heard of Azure Synapse Analytics, but don’t know how to get started, well, you’re in the right place. Here’s some steps (and comment) that might help you set up your first Workspace. I have to say ‘comment’ because it’s not 100% plain sailing unless you know what you’re doing, and there are a couple of things that are worth noting from my own experience in starting from scratch. Some familiarity with the Microsoft Azure Portal is assumed, as is the requirement to have a Visual Studio Subscription, and it’s here that we find the first comment:
Comment 1: Why isn’t it easier to get a free Visual Studio subscription ?
By ‘easier’ I mean that there’s a requirement to provide payment details, even for the free-tier stuff. The simplest (and free-est) subscription is called Dev Essentials – $200 free credit on sign-up to be used within 30-days, most services free for a year, and then some services always free. I’ll let you look that up for yourself, but it seems a bit of barrier to entry if you have to provide payment details up front if you’re only going to use the free stuff. Other cloud data providers (MongoDB Atlas, for example) have a free tier that has no such requirement. Maybe it would be better to have the ‘always free’ services always accessible and then bolt-on the pay-as-you-go services as and when you want them. Or perhaps that’s just me….
Anyway, assuming you have a subscription of some sort and can sign in to the Azure Portal, here’s how I set up My First Workspace ™:
On the portal home page, choose the Quick Start Center, then the one that says the thing about a database and then choose the one that mentions Azure Synapse Analytics:
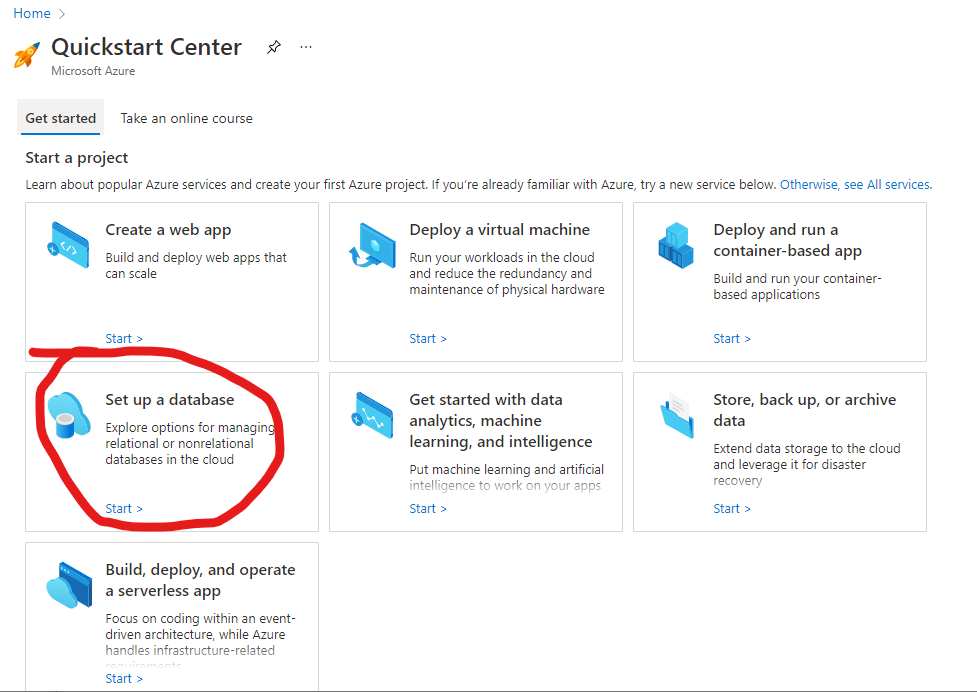
Comment 2: You might have thought that you should hit up the ‘..data analytics, machine learning, and intelligence..’ one. You’d be wrong. What we’re *actually* setting up here is somewhere to put stuff to play with – the resource group and the workspace. It’s not even really a database, so you kinda have to excuse the mixed-messaging on the portal. I guess there just has to be words…
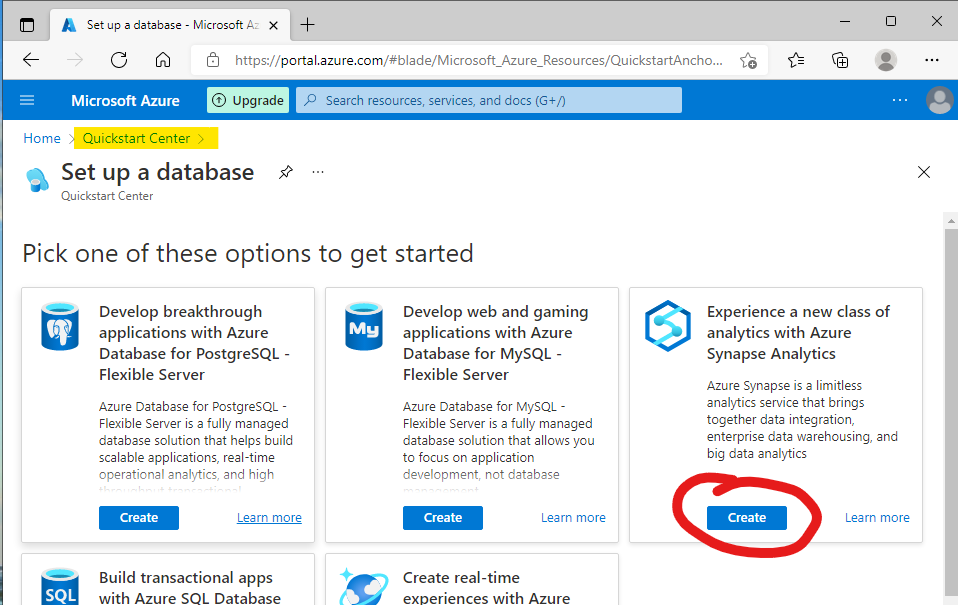
Once you’ve selected ‘Create‘, you are then taken to a configuration page that looks a bit like all the other configuration pages in the Azure Portal (if you’ve seen them before). From here, you just fill in the boxes. Well, no. Some of the boxes are auto-populated for you (the ones in green in the next image). The yellow ones are the ones you have to fill in. Oh, and..
Comment 3: Having different formatting requirements and naming rules on the same form is maddening in the extreme. Some accept MixedCase, some don’t. Some have to be globally unique (ie across *all* of Azure) and some don’t. Helpfully, the form will complain that you’ve violated an arbitrary rule and give you some tips on how to calm it back down again.

You can see that I got massively creative with names and stuff. Seriously, life’s to short to worry about it too much – as long as you can assign tags later on when you get lost in metadata, you should be fine.
The region is East US in the example because when I tried to create it in another region, it failed. That was probably my fault. East US worked, and I’m not precious about it so that’s where it is. You can’t untick the tick box, but to be fair that’s a lot of words right there that most people don’t really understand, so it’s probably for the best.
The Security section is mandatory, the other stuff (networking, tags) less so. Wait, I feel…
Comment 4: If a form or secion is mandatory, can you not display the review and create until it’s completed ? Thanks !
This is where you define all the security stuff. Well, not all the security but enough to get you started. This mainly consists of defining a username for sysadmin functions and password for it that you’ll be using later on (once everything’s set up), but it’s created here so you can supply a password, forget to write it down and shout at your computer later on when you try and reset it..
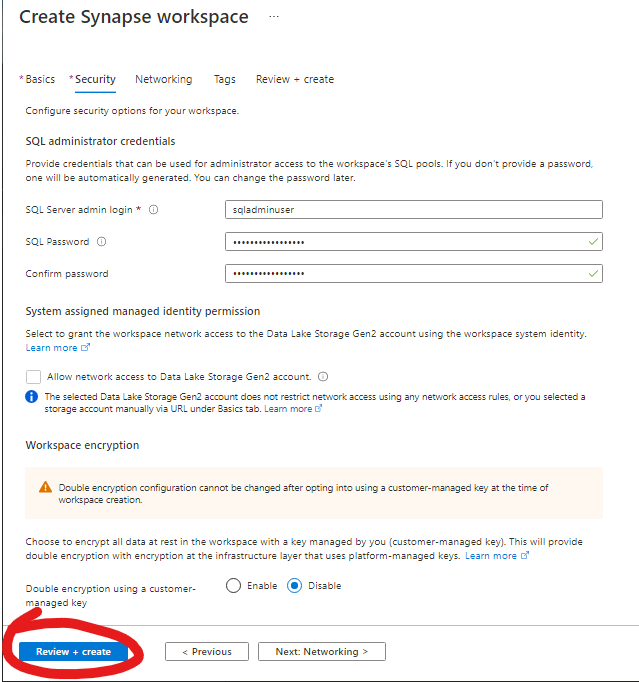
Annoyinngly, if you’ve set up Data Lake Storage Gen 2 account like it asked you to in the previous blade, you can’t check the check box. Let’s assume that all’s good and move on.
A word on TDE (transparent data encryption) is worthwhile at this point. Since the data will by default be protected at rest because it’s Azure and they wouldn’t be allowed to store stuff for you without some form of encryption, there’s no need to supply your own key for what is, in effect, encrypting stuff that’s already encrypted. Unless you really really want to. I mean, you must *really* really want to, because enabling double encryption will send you down a rabbit hole of Azure Key Vault and customer-defined key rotation that quite frankly is a bit much if you’re just having a look to see what this technology can do. But it’s there if you want it, and I suppose it’s better to have security front-of-mind.
So, that’s it. The last (mandatory) thing you need to do is punch ‘Review + create‘ ! Well, not really – once you hit that, it takes you to a review page, and then you can hit ‘Create‘. At this point, it’s not worth making a comment about this – Azure is as Azure does…
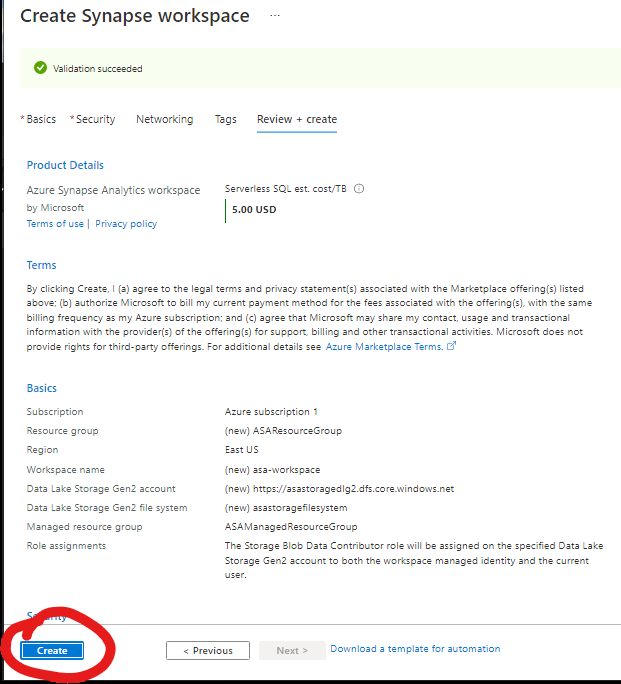
Skillfully ignoring the ‘Serverless SQL est. cost / TB‘ notice (because it’s a free service)… wait.. what ??!?… the ‘Create‘ button can now be pushed. Again, this takes you to another information blade, and if it looks a bit like the next image after about 5 minutes, then you win and it’s high-fives all round…
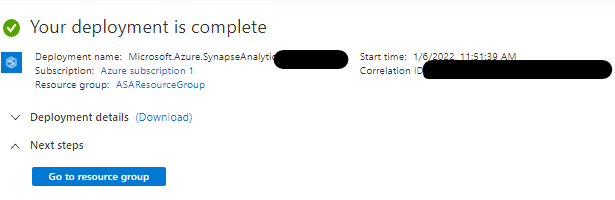
Congrats. You are now the proud owner of an Azure Synapse Workspace !
Comment 5: It would be useful at this point to take you to the workspace so you can start to take a look. Disappointlingly, you are instead taken to the resource group that contains your workspace. You have to remember what you called it in the first configuration form and then select it.
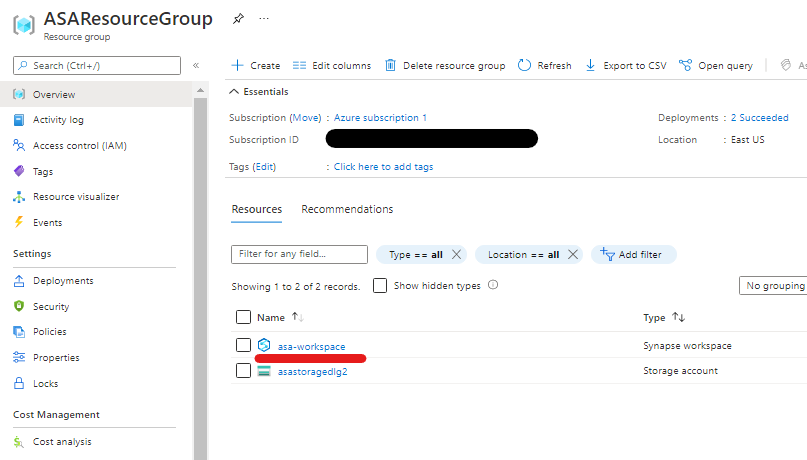
Once you do that, you get something like this (apologies for the redaction, but you know, security)…
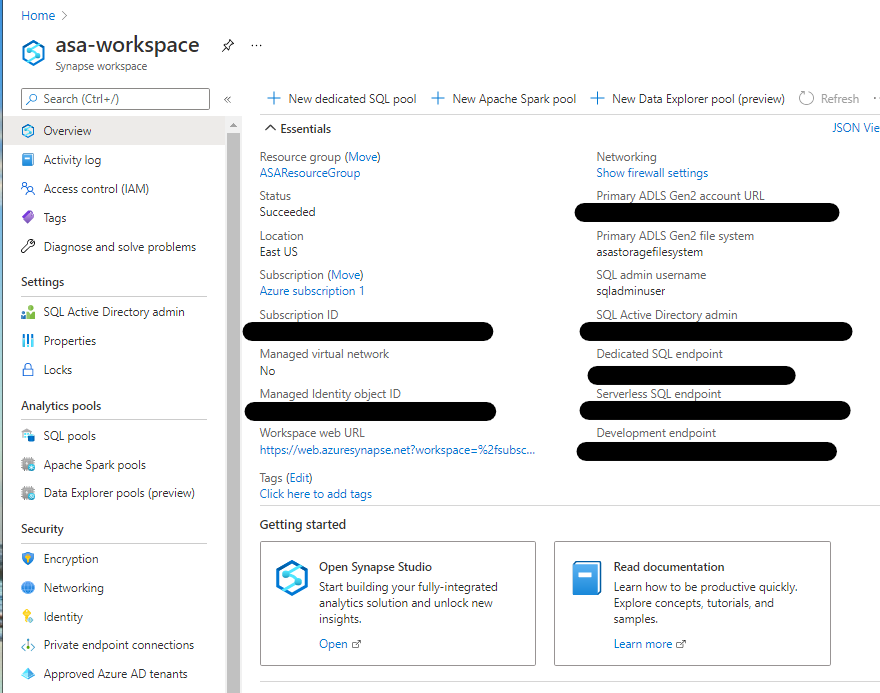
That’s it !
You’re probably going to want to hit a few of those options right now. I’ll leave you to it.
I only said we’d set one up, not what happens when you play with it 🙂
Back soon….

One thought on “Azure Synapse Workspace – getting started”